
This tutorial builds on the capabilities we explored in the “Red Hat SSO + 3Scale API Management” series and in particular in the first tutorial. In this post, we will:
- configure 3Scale SaaS with a new API
- stand up a self-managed APICast Gateway
- define a client application
- configure OAuth2 (Authorization Code Grant)
- demonstrate authentication of an end user (using the OAuth2 + OIDC Debugger) and the test app invoking an API protected by 3Scale + APICast.
In earlier blog posts, we explored “What are APIs?” and “What is API Management?”. We also explored the theory behind OAuth2 and OpenID Connect (OIDC). We’ve looked at the use of OAuth2 and OIDC with just Red Hat SSO v7.1. Now, we are going to tie all of this together with a concrete example using OAuth2 in 3Scale API Management to protect an API. The end result is very similar to what I built earlier this year with Azure Active Directory and Apigee Edge in this post. An important difference between the Azure Active Directory example and the Red Hat SSO configuration used here is that AAD had application definitions for both the API and API Consumer. Then, a relationship was defined between these two applications that allowed the API Consumer to obtain a token with the audience for the API application. The Red Hat SSO v7.1 features (Authorization Services) that allow for similar functionality is in technology preview in v7.1. We will revisit this functionality a little later once it is fully supported.
You can see the end result of all these pieces in the following diagram.

Assumptions
As always, we start off with a bunch of assumptions to make sure we are all on the same page.
- You have admin access to a 3Scale Management Console for your org. Make note of the org name and admin console URL.
- This tutorial was created with 3Scale SaaS. You should be able to do the same thing with an on-premise deployment. However, the OpenShift configuration details are beyond the scope of this post.
- Auto provisioning of client definitions to RH SSO (from 3scale) is not configured in this document. If this is needed, the instructions can be found here. In a real-world API Management solution, this would be required (or, at least, highly advantageous functionality).
- An APICast gateway will be run on the local machine as a docker container on port 8080. There are several options for doing this including docker, native installation (with RPM packages), or OpenShift.
- A Red Hat SSO v7.1 installation is deployed on an Amazon EC2 instance. This is the same Red Hat SSO installation that was used to create earlier tutorials in this series.
- This tutorial will use the out-of-the-box Echo API that 3Scale provides.
- This tutorial uses the OAuth2 + OIDC Debugger that was introduced in earlier tutorials.
- This tutorial will use 3Scale’s out-of-the-box OAuth2 Authorization Code Grant. By simply adding “scope=openid profile User” to the OAuth2 requests, this is actually using OpenID Connect.
- The Swagger Editor will be used to make a test call to the Echo API.
- Self-signed certificates are used in this example. To keep things simple, we are ignoring trust of those certificates. Far more care must be taken with PKI concerns for a real-world deployment.
3Scale API Management Setup
First, let’s setup the API configuration in the 3Scale Management Console.
- Open a browser and go to “https://your-org-admin.3scale.net”.
- Log into the 3Scale Saas Management Console with an administrator user.

- Click on the APIs tab.

- Click the “Create Service” link.
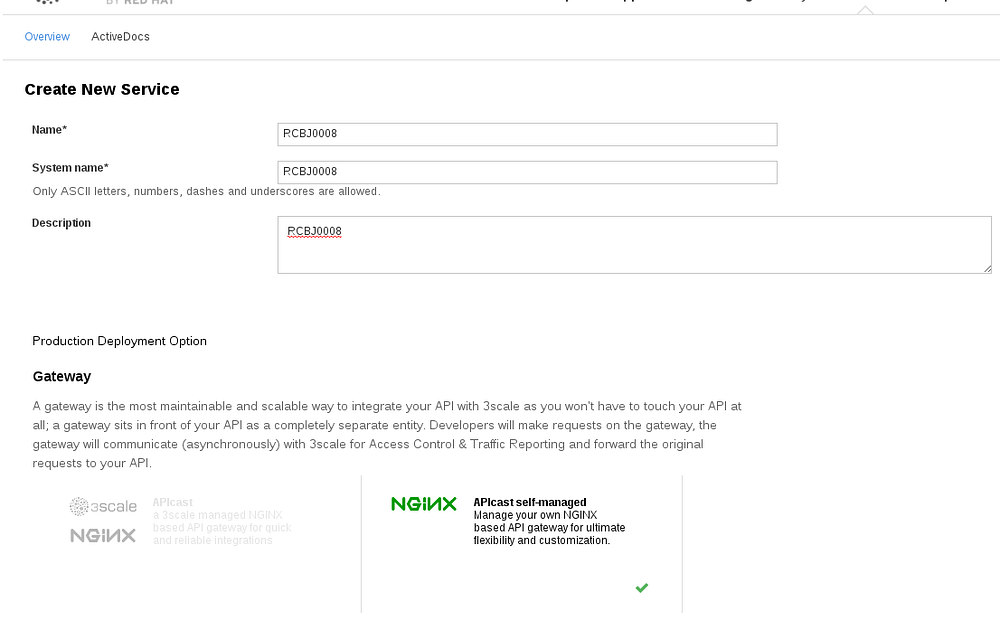
- Enter the Name, System Name, and Description.
- Click NGINX APIcast self-managed Gateway. There will be a green checkbox on the lower-righthand corner of that box.
- Scroll down to the Authentication section.
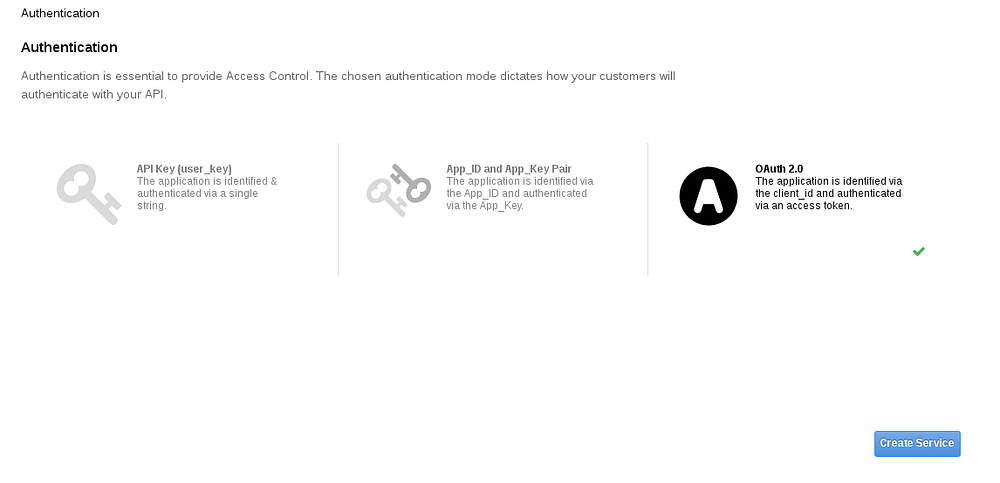
- Click OAuth 2.0 icon.
- Click Create Service.
- Scroll down to your new service.
- Click the Service Name to expand service section.
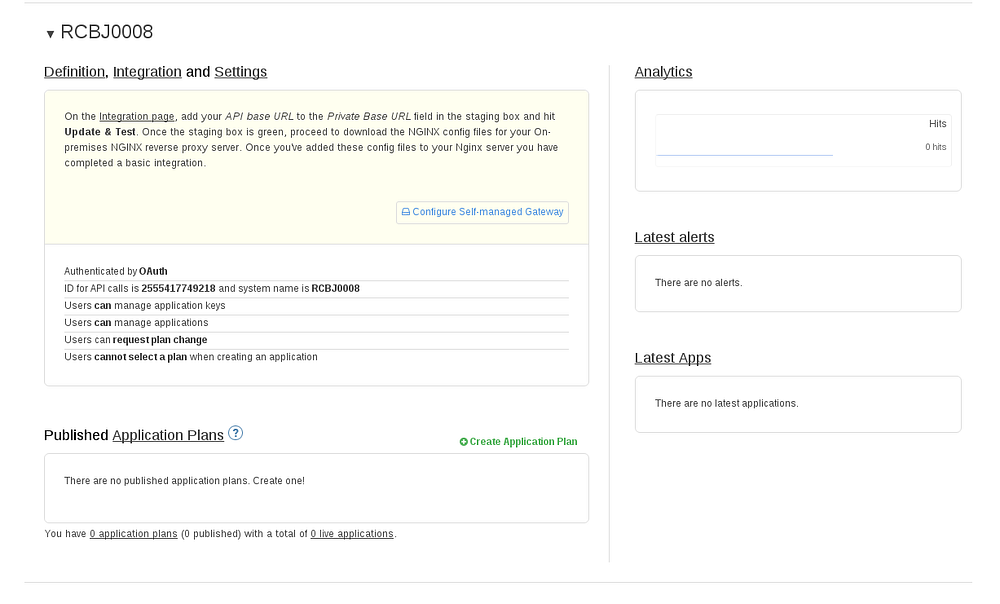
- Make note of the API ID for later (2555417749218 in this case).
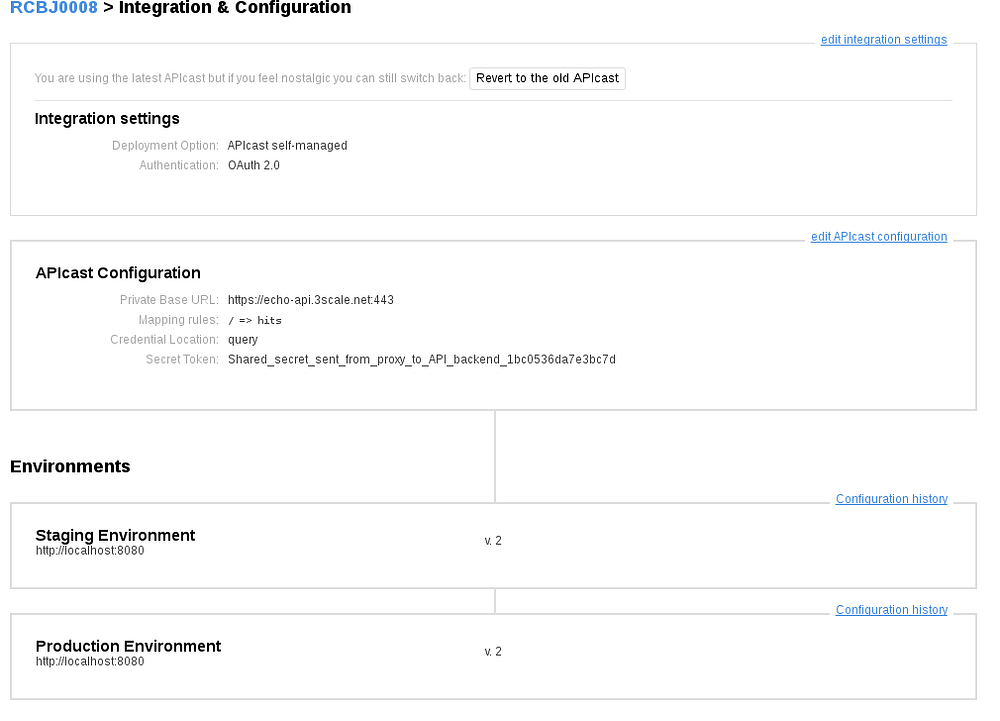
- Click on the Integration link.
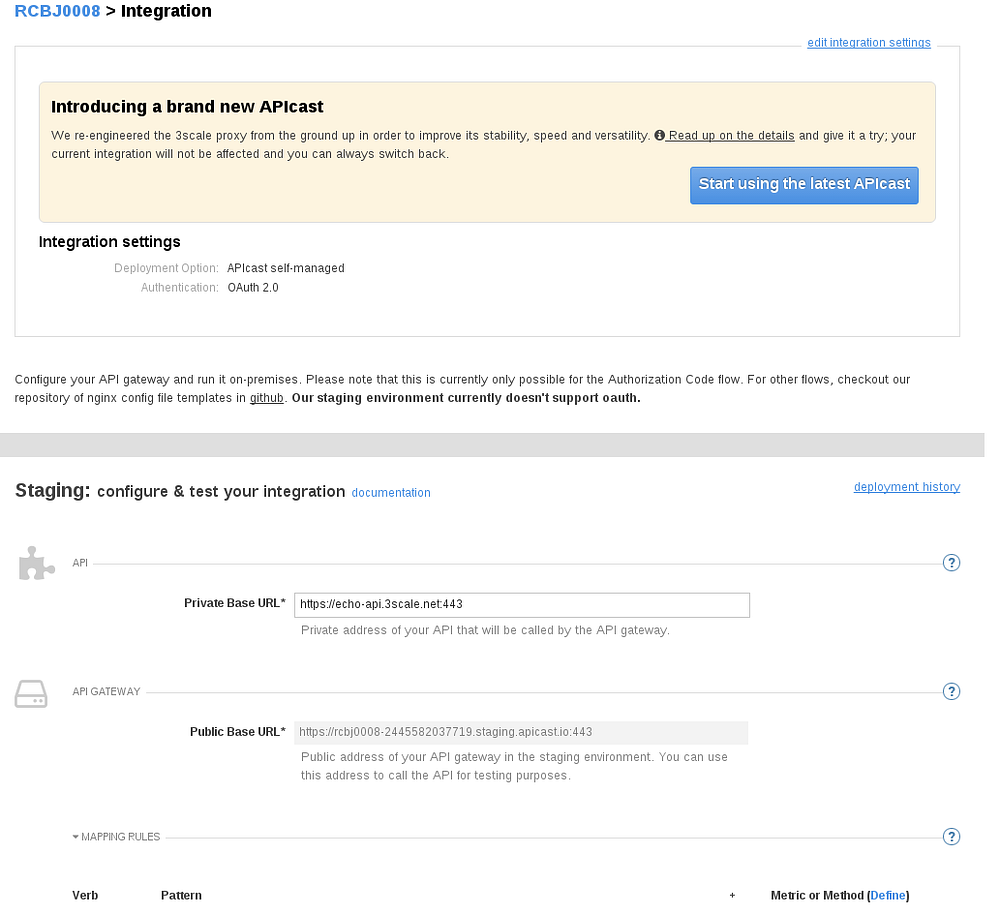
- Click on the “Start using the latest APICast” button. Note, at some point in the near future, this step likely won’t be needed.
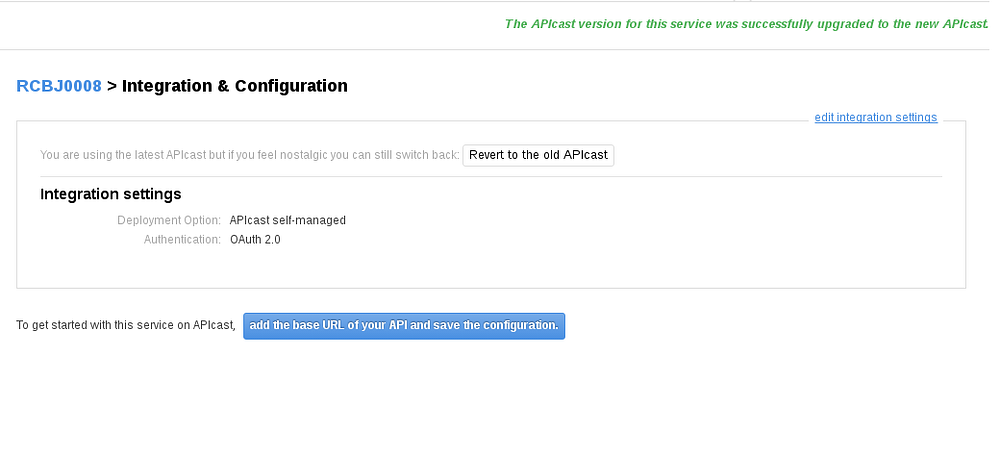
- You will see ‘The APIcast version for this service was successfully upgraded to the new APIcast”.
- Click the “add the base URL of your API and save the configuration.” button.
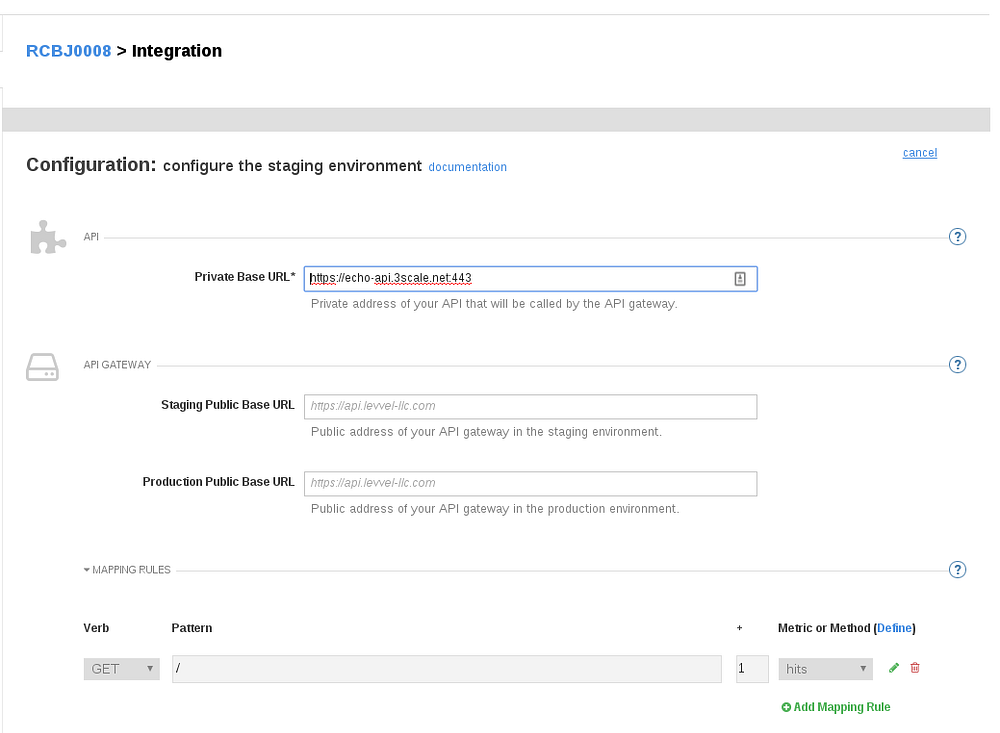
- We’ll use the Echo API for testing purposes. Don’t change the default value.
- Put “http://localhost:8080” in the “Staging Public Base URL” and “Production Public Base URL” fields.
- Scroll down to Authentication Settings.
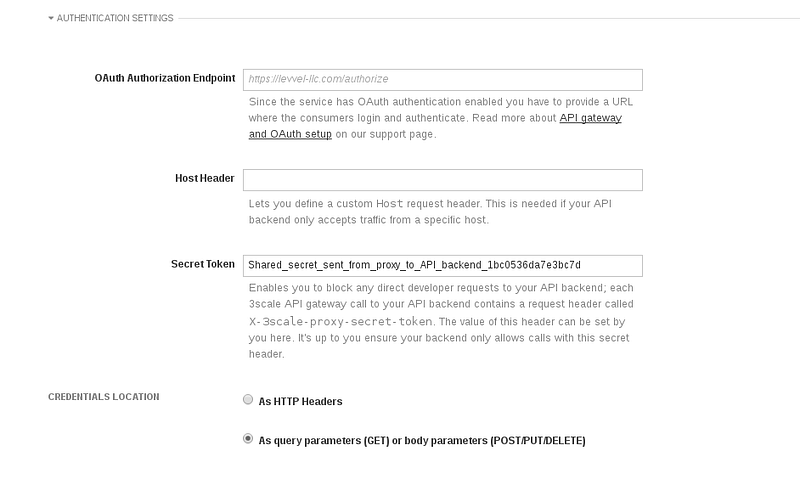
- Leave the “OAuth Authorization Endpoint” field blank. This parameter will be specified directly to the self-managed APICast Gateway instance as an environment variable.
- Scroll down.
- Click the “Update the Staging Environment.”
- After the page refreshes, scroll to the bottom again (if not already there). Click the “Back to Integration and Configuration” link.
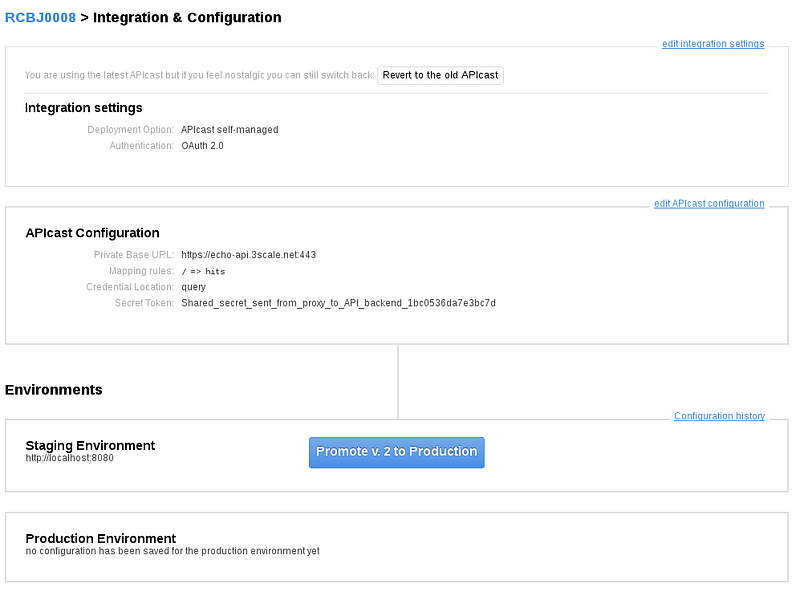
- Click the “Promote v* to Production button.”
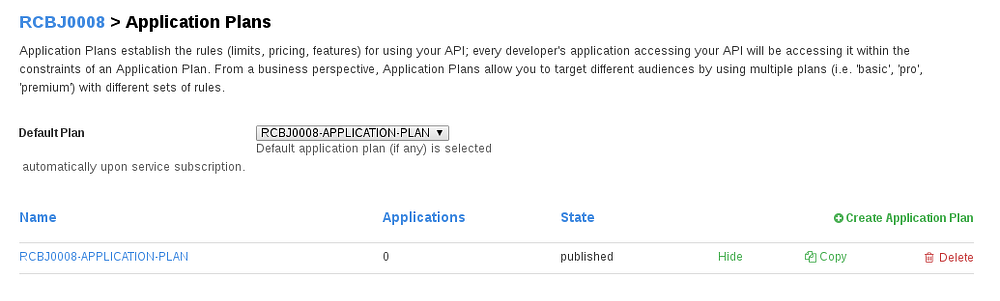
- Click on the “Application Plans” node.
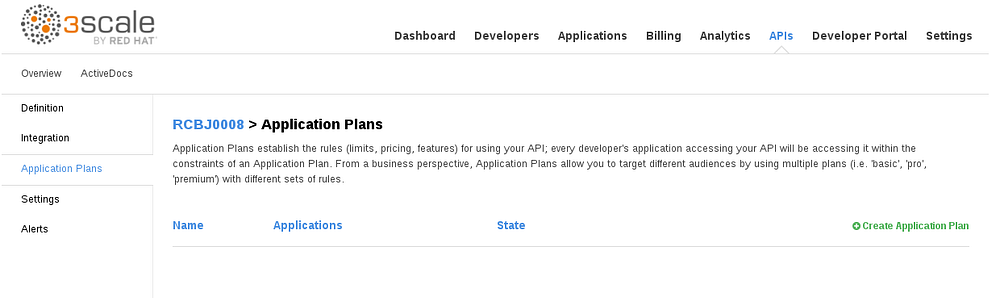
- Click the “Create Application Plan” link.
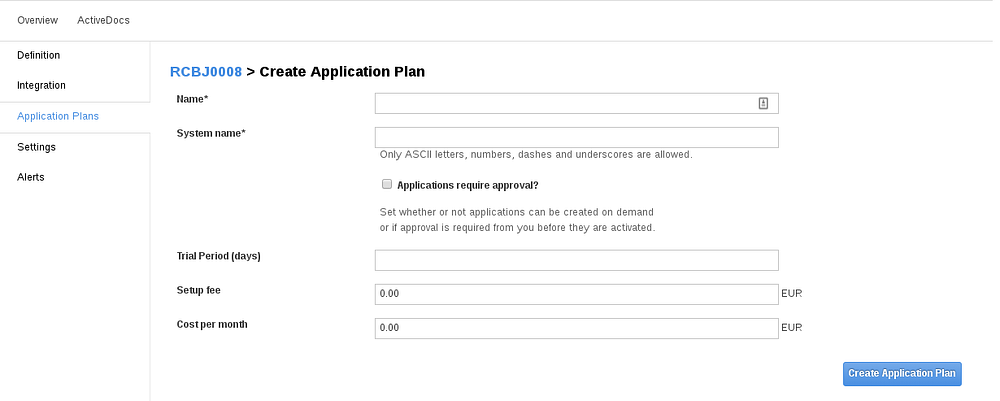
- Enter the Name and System Name fields (you can use APINAME-APPLICATION-PLAN).
- Click the “Create Application Plan” button.
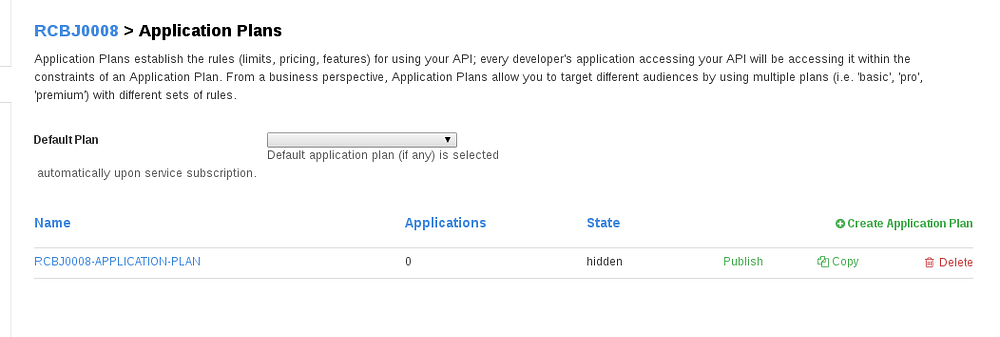
- Choose the new Application Plan from the Default Plan drop down.
- Click the Publish link next to the new application plan.
- Make sure the state says visible.
- Click the Developers tab.

- Create a new developer account if necessary. In this example, I already have one present.
- Click the org link next to the developer account that will own the application (Client) we are creating.

- Click the “Service Subscriptions” link.

- Click the “Subscribe” link next to the new API/Service.
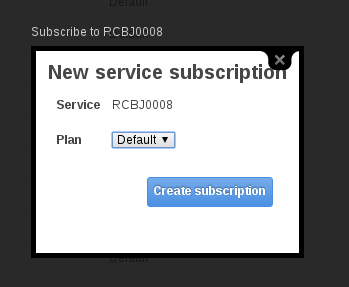
- In the popup, choose “Default” from the plan drop down.
- Click the Create subscription link.

- Click the Applications link.
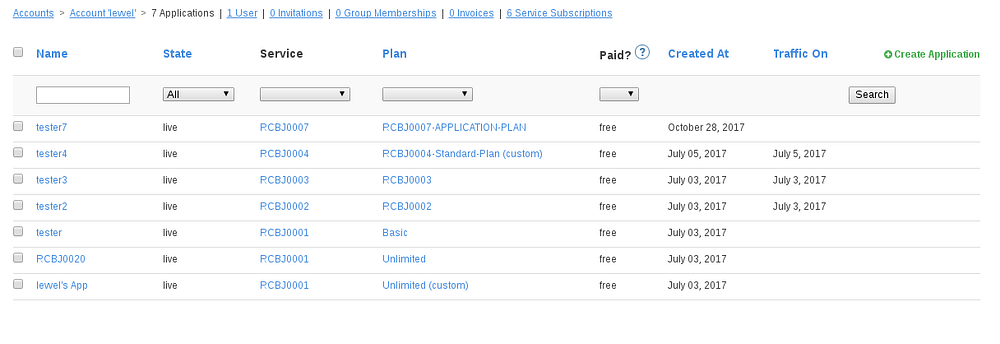
- Click the “Create Application” link in the upper-right-hand corner.
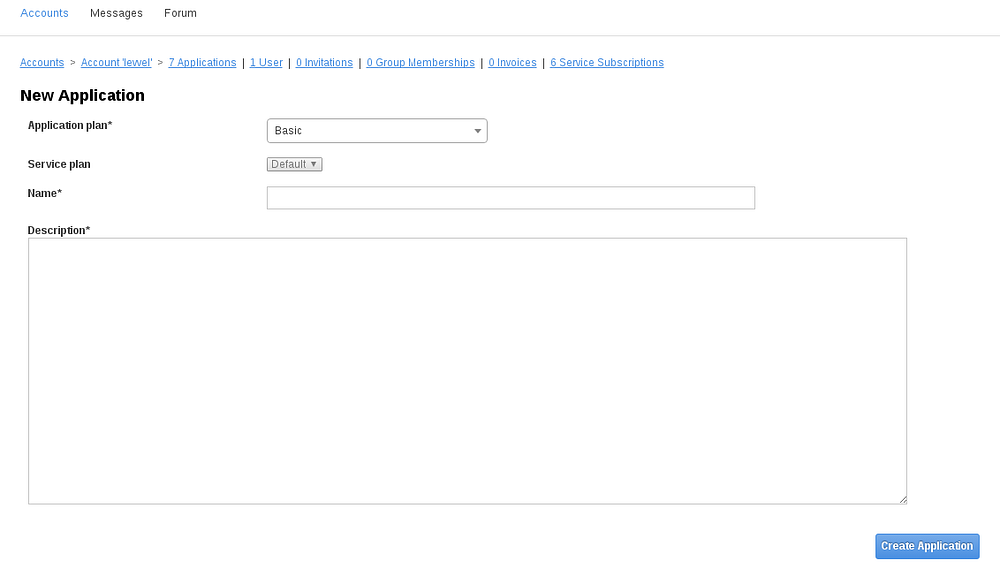
- From the “Application Plan” drop down, choose the Application Plan that was created above.
- Enter a Name and Description as appropriate.
- Click the Create Application button.

- Make note of the client ID and Client Secret. These will be needed a little later.
- Click the Change link next to the RedirectURL.
- Enter “http://localhost:3000/callback”.
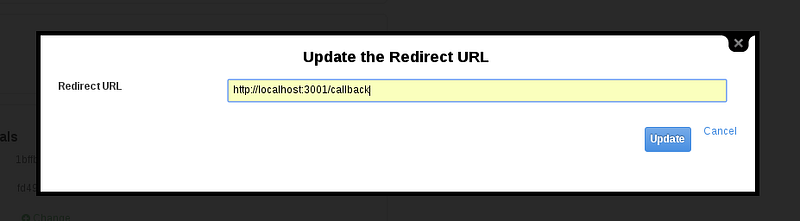
- Click the Update button.
APICast Gateway Setup
To run a self-managed instance of APICast on your own machine(s), do the following:
- Install and start Redis using instructions relevant to your system. On RHEL-based system (or similar), run:
# yum install redis
# systemctl start redis
Our OAuth2 + OIDC Debugger application is a Javascript application that is running inside a browser; so, it must take CORS (Cross Origins Resource Sharing) into account. To add CORS support to APICast, we have the following:
https://access.redhat.com/solutions/3174481
Although, there are no officially supported solutions for CORS at the time of this writing, Red Hat points us at the following example on github.io:
https://access.redhat.com/solutions/3174481
We incorporate the details of this example into the start command that is used below (the two ‘-v’ options).
- Clone the APICast Git Hub repo so that we can reference the CORS configuration file and LUA script. Run the following:
git clone https://github.com/3scale/apicast.git
- Make note of the full path of the base directory containing the “examples” directory in the repository above. It should be “`pwd`/apicast”.
- To start APICast, run the following:
# docker run --name apicast --rm -p 8080:8080 --net=host -e THREESCALE_PORTAL_ENDPOINT=https://${ADMIN_API_KEY}@${ORG}-admin.3scale.net -e REDIS_HOST=${REDIS_HOST} -e RHSSO_ENDPOINT=${RHSSO_ENDPOINT} -e APICAST_LOG_LEVEL=debug -e APICAST_SERVICES=${APICAST_SERVICE} -e THREESCALE_DEPLOYMENT_ENV=production -e APICAST_MODULE=cors -e OPENSSL_VERIFY=0 -v ${APICAST_DIR}/examples/cors/cors.lua:/opt/app-root/src/src/cors.lua:ro -v ${APICAST_DIR}/examples/cors/cors.conf:/opt/app-root/src/apicast.d/cors.conf:ro registry.access.redhat.com/3scale-amp20/apicast-gateway:1.0
where
ADMIN_KEY = THE_ADMIN_KEY_THAT_WAS_GENERATED_EARLIER
ORG=YOUR_ORG
RHSSO_ENDPOINT = https://rh-sso-host:8443/auth/realms/demo_project_sf (rh-sso-host is your RH SSO server)
REDIS_HOST = localhost (probably, but any valid redis endpoint)
APICAST_SERVICE = API_ID_FOR_TEST_API (obtained earlier)
OPENSSL_VERIFY_TEST = 0 (ignore certificate trust, for testing only)
APICAST_DIR=PATH_TO_EXAMPLE_DIR_NOTED_EARLIER
Here is the same command with better formatting for readability:
# docker run --name apicast --rm -p 8080:8080 --net=host
-e THREESCALE_PORTAL_ENDPOINT=https://${ADMIN_KEY}@{ORG}-admin.3scale.net
-e REDIS_HOST=${REDIS_HOST}
-e RHSSO_ENDPOINT=${RHSSO_ENDPOINT}
-e APICAST_LOG_LEVEL=debug
-e APICAST_SERVICES=${APICAST_SERVICE}
-e THREESCALE_DEPLOYMENT_ENV=production
-e OPENSSL_VERIFY=${OPENSSL_VERIFY_TEST}
-e APICAST_MODULE=cors
-v ${APICAST_DIR}/examples/cors/cors.lua:/opt/app-root/src/src/cors.lua:ro
-v ${APICAST_DIR}/examples/cors/cors.conf:/opt/app-root/src/apicast.d/cors.conf:ro
registry.access.redhat.com/3scale-amp20/apicast-gateway:1.0
- When starting APICast, if you encounter SELinux related errors similar to the following (from journalctl):
Nov 20 13:09:16 host python3[31905]: SELinux is preventing openresty from read access on the file cors.conf.

                                       *****  Plugin catchall (100. confidence) suggests   **************************

                                       If you believe that openresty should be allowed read access on the cors.conf file by default.
                                       Then you should report this as a bug.
                                       You can generate a local policy module to allow this access.
                                       Do
                                       allow this access for now by executing:
                                       # ausearch -c 'openresty' --raw | audit2allow -M my-openresty
                                       # semodule -X 300 -i my-openresty.pp

Nov 20 13:09:16 hostNetworkManager[1360]: <info>  (docker0): link disconnected (calling deferred action)
Run the following:
[root@host broeckel]# ausearch -c 'openresty' --raw | audit2allow -M my-openresty
******************** IMPORTANT ***********************
To make this policy package active, execute:
semodule -i my-openresty.pp
[root@host broeckel]# semodule -X 300 -i my-openresty.pp
[root@host broeckel]#
- If you are still getting the following error,
Nov 20 10:31:31 dnsmasq[11]: cleared cache
2017/11/20 10:31:31 [emerg] 1#1: fstat() “/opt/app-root/src/conf/../apicast.d/cors.conf” failed (13: Permission denied)
nginx: [emerg] fstat() “/opt/app-root/src/conf/../apicast.d/cors.conf” failed (13: Permission denied)
- run the following command as root:
[root@host broeckel]# setenforce permissive
Red Hat SSO Setup
- Follow the steps described in this tutorial to install Red Hat SSO v7.1 and configure a new Realm (the “Red Hat SSO Instance Installation” and “Red Hat SSO Realm Setup Procedure” Sections).
- In Red Hat SSO, create an Initial Access Token under “Client Registrations” tab on the Realms screen.
- Use the initial access token and realm name + client_id, client_secret, and redirectURI from the application definition created earlier to update the following script:
#!/bin/bash
#Update these variables with the values obtained earlier.
CLIENT_ID=
CLIENT_SECRET=
REDIRECT_URI=
KEY=
REALM=
RH_SSO_HOST=
curl -v -X POST
-d ‘{ “clientId”: “${CLIENT_ID}”, “secret”: “${CLIENT_SECRET}”,”redirectUris”:[“${REDIRECT_URI}"] }’
-H “Content-Type:application/json”
-H “Accept: application/json”
-H “Authorization: Bearer KEY”
https://${RH_SSO_HOST}:8443/auth/realms/${REALM}/clients-registrations/default --insecure -D headers.out
where:
CLIENT_ID=the 3Scale test application client_id that was just created.
CLIENT_SECRET=the 3Scale test application client_secret that was just created.
REDIRECT_URI=the 3Scale test application redirect_uri that was just created.
KEY=INITIAL_ACCESS_TOKEN just created in Red Hat SSO
REALM=RH_SSO_REALM_NAME
RH_SSO_HOST=resolvable Red Hat SSO URL hostname
- Run the script above to create a corresponding client definition in RH SSO that matches what we have created in 3scale.
- If successful, the curl command will return a 200 response code and something similar to the following:
{
  "id": "9452e9ab-a491-43fa-9cba-2b9cfa85e475",
  "clientId": "379fbeeb123",
  "surrogateAuthRequired": false,
  "enabled": true,
  "clientAuthenticatorType": "client-secret",
  "secret": "*****************************************************",
  "registrationAccessToken": "****************",
  "redirectUris": [
    "http://localhost:3001/callback"
  ],
  "webOrigins": [
    "http://localhost:3001"
  ],
  "notBefore": 0,
  "bearerOnly": false,
  "consentRequired": false,
  "standardFlowEnabled": true,
  "implicitFlowEnabled": false,
  "directAccessGrantsEnabled": false,
  "serviceAccountsEnabled": false,
  "publicClient": false,
  "frontchannelLogout": false,
  "attributes": {},
  "fullScopeAllowed": true,
  "nodeReRegistrationTimeout": -1,
  "protocolMappers": [
    {
      "id": "781279b5-0c19-4b1c-a99b-86c2b3b4fd11",
      "name": "full name",
      "protocol": "openid-connect",
      "protocolMapper": "oidc-full-name-mapper",
      "consentRequired": true,
      "consentText": "${fullName}",
      "config": {
        "id.token.claim": "true",
        "access.token.claim": "true"
      }
    },
    {
      "id": "a5483405-cd38-4831-a964-72ddbaf55c4b",
      "name": "given name",
      "protocol": "openid-connect",
      "protocolMapper": "oidc-usermodel-property-mapper",
      "consentRequired": true,
      "consentText": "${givenName}",
      "config": {
        "userinfo.token.claim": "true",
        "user.attribute": "firstName",
        "id.token.claim": "true",
        "access.token.claim": "true",
        "claim.name": "given_name",
        "jsonType.label": "String"
      }
    },
    {
      "id": "655a692a-bdc2-4c31-912d-74c391caaaff",
      "name": "role list",
      "protocol": "saml",
      "protocolMapper": "saml-role-list-mapper",
      "consentRequired": true,
      "consentText": "role list",
      "config": {
        "single": "false",
        "attribute.nameformat": "Basic",
        "attribute.name": "Role"
      }
    },
    {
      "id": "8e004565-f745-490f-a40f-aeea7603d498",
      "name": "username",
      "protocol": "openid-connect",
      "protocolMapper": "oidc-usermodel-property-mapper",
      "consentRequired": true,
      "consentText": "${username}",
      "config": {
        "userinfo.token.claim": "true",
        "user.attribute": "username",
        "id.token.claim": "true",
        "access.token.claim": "true",
        "claim.name": "preferred_username",
        "jsonType.label": "String"
      }
    },
    {
      "id": "f8f6ad46-51c7-480a-942e-f65c0cc0ca73",
      "name": "email",
      "protocol": "openid-connect",
      "protocolMapper": "oidc-usermodel-property-mapper",
      "consentRequired": true,
      "consentText": "${email}",
      "config": {
        "userinfo.token.claim": "true",
        "user.attribute": "email",
        "id.token.claim": "true",
        "access.token.claim": "true",
        "claim.name": "e* Connection #0 to host ************************** left intactnmail",
        "jsonType.label": "String"
      }
    },
    {
      "id": "5cbdcc01-2e27-426b-9afc-2cd912e8feed",
      "name": "family name",
      "protocol": "openid-connect",
      "protocolMapper": "oidc-usermodel-property-mapper",
      "consentRequired": true,
      "consentText": "${familyName}",
      "config": {
        "userinfo.token.claim": "true",
        "user.attribute": "lastName",
        "id.token.claim": "true",
        "access.token.claim": "true",
        "claim.name": "family_name",
        "jsonType.label": "String"
      }
    }
  ],
  "useTemplateConfig": false,
  "useTemplateScope": false,
  "useTemplateMappers": false
}
- Return to the Red Hat SSO tutorial and go to the “Setup Red Hat SSO Client Configuration” Section. Begin at the “Set the Client Protocol to ‘openid-connect’ (the default)” step. Continue through the end of the section. You will be customizing the client that was created above that matches the 3Scale application you are working with.
The OAuth2 + OIDC Debugger
- Follow the instructions here to setup the OAuth2 + OIDC Debugger app on your local machine. This is a simple test application that simulates the interaction between a real app and an IdP using the OAuth2 or OIDC protocols.
- Open a web browser.
- Go to “http://localhost:3000”.

- Make sure “OAuth2 Authorization Code Grant” is chosen from the drop down.
- Enter “http://localhost:8080/authorize” in the “Authorization Endpoint” field.
- Enter “http://localhost:8080/oauth/token” in the “Token Endpoint” field.
- The State field is automatically populated with a random UUID field.
- Enter the client_id from application/client that was created in Red Hat SSO and 3scale.
- Enter the redirectURL (http://localhost:3000/callback, if you are following this tutorial verbatim).
- Enter the scope “openid profile User”.
- Click the Authorize button.
- The browser will be redirected to the RH SSO sign on workflow.

- Enter “user1” and “password123” as the username and password.
- Click the Log In button.

- Enter “user1” and “secret” as the username and password.
- Click the Log in button.
- This ends with the the browser being redirected to the redirectURL with an authorization code.
- You can see the authorization code is auto-populated.
- Put the client_id and client_secret into their respective fields.
- Click the Get Token button.
- You will see something similar to the following returned.

- You can view the contents of the access_token (JWT) by copying the value into jwt.io.
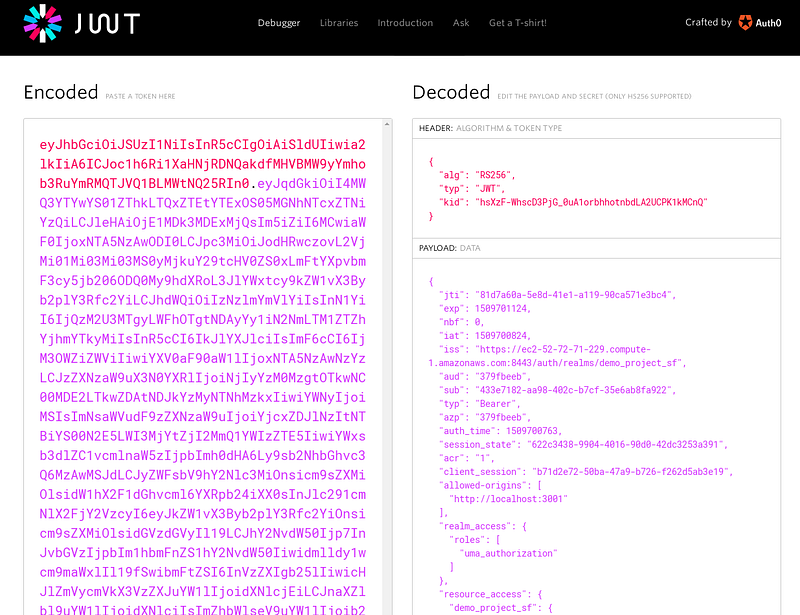
- The JWT token payload looks something like:
{
“jti”: “81d7a60a-5e8d-41e1-a119–90ca571e3bc4”,
“exp”: 1509701124,
“nbf”: 0,
“iat”: 1509700824,
“iss”: “https://rh-sso-host:8443/auth/realms/demo_project_sf",
“aud”: “379fbeeb”,
“sub”: “433e7182-aa98–402c-b7cf-35e6ab8fa922”,
“typ”: “Bearer”,
“azp”: “379fbeeb”,
“auth_time”: 1509700763,
“session_state”: “622c3438–9904–4016–90d0–42dc3253a391”,
“acr”: “1”,
“client_session”: “b71d2e72–50ba-47a9-b726-f262d5ab3e19”,
“allowed-origins”: [
“http://localhost:3000"
],
“realm_access”: {
“roles”: [
“uma_authorization”
]
},
“resource_access”: {
“demo_project_sf”: {
“roles”: [
“User”
]
},
“account”: {
“roles”: [
]
}
},
“name”: “user one”,
“preferred_username”: “user1”,
“given_name”: “user”,
“family_name”: “one”,
“email”: “user1@levvel.io”
}
- In the earlier Red Hat SSO v7.1 tutorials, I spend time analyzing the information in the JWT Payload.
Test API Call
- Copy the Echo API Swagger document:
{
  "swagger": "2.0",
  "info": {
    "version": "1.0.0",
    "title": "Echo API",
    "description": "A sample echo API"
  },
  "host": "echo-api.3scale.net",
  "basePath": "/",
  "schemes": [
    "http"
  ],
  "consumes": [
    "application/json"
  ],
  "produces": [
    "application/json"
  ],
  "securityDefinitions": {
    "oauth": {
      "type": "oauth2",
      "authorizationUrl": "http://localhost:8080/authorize",
      "tokenUrl": "http://localhost:8080/oauth/token",
      "flow": "accessCode",
      "scopes": {
        "openid profile User": "Perform user related functions"
      }
    }
  },
  "paths": {
    "/": {
      "get": {
        "description": "Echo API with no parameters",
        "operationId": "echo_no_params",
        "produces": [
          "application/json",
          "application/xml",
          "text/xml",
          "text/html"
        ],
        "parameters": [
          {
            "name": "user_key",
            "in": "query",
            "description": "Your API access key",
            "required": true,
            "x-data-threescale-name": "user_keys",
            "type": "string"
          }
        ],
        "responses": {
          "200": {
            "description": "response",
            "schema": {
              "$ref": "#/definitions/ResponseModel"
            }
          },
          "default": {
            "description": "unexpected error",
            "schema": {
              "$ref": "#/definitions/ErrorModel"
            }
          }
        },
        "security": [
                  {  "oauth": ["openid profile User"] }
                ]
      }
    },
    "/{echo}": {
      "get": {
        "description": "Echo API with parameters",
        "operationId": "echo_with_params",
        "produces": [
          "application/json",
          "application/xml",
          "text/xml",
          "text/html"
        ],
        "parameters": [
          {
            "name": "echo",
            "in": "path",
            "description": "The string to be echoed",
            "required": true,
            "type": "string"
          },
          {
            "name": "user_key",
            "in": "query",
            "description": "Your API access key",
            "required": true,
            "x-data-threescale-name": "user_keys",
            "type": "string"
          }
        ],
        "responses": {
          "200": {
            "description": "response",
            "schema": {
              "$ref": "#/definitions/ResponseModel"
            }
          },
          "default": {
            "description": "unexpected error",
            "schema": {
              "$ref": "#/definitions/ErrorModel"
            }
          }
        }
      }
    }
  },
  "definitions": {
    "ResponseModel": {
      "type": "object",
      "required": [
        "method",
        "path",
        "args",
        "headers"
      ],
      "properties": {
        "method": {
          "type": "string"
        },
        "path": {
          "type": "string"
        },
        "args": {
          "type": "string"
        },
        "headers": {
          "type": "object"
        }
      }
    },
    "ErrorModel": {
      "type": "object",
      "required": [
        "code",
        "message"
      ],
      "properties": {
        "code": {
          "type": "integer",
          "format": "int32"
        },
        "message": {
          "type": "string"
        }
      }
    }
  }
}
- Open http://editor.swagger.io in a browser tab.
- Paste the swagger definition into the editor.
- Give the editor a moment to refresh the current view.
- You will see something similar to the following on the right-hand side.

- Click the Authenticate button.

- Enter the access token from the OAuth2 + OIDC Debugger “Access Token” field above.
- Click the Authenticate button.
- Scroll down to the ‘/’ Path on the right-hand pane.

- Click the “Try this operation” button.

- Click the “Send Request” button.

- The actual response looks like
{
  "method": "GET",
  "path": "/",
  "args": "",
  "body": "",
  "headers": {
    "HTTP_VERSION": "HTTP/1.1",
    "HTTP_HOST": "echo-api.3scale.net",
    "HTTP_ACCEPT": "application/json",
    "HTTP_ACCEPT_ENCODING": "gzip, deflate, sdch, br",
    "HTTP_ACCEPT_LANGUAGE": "en-US,en;q=0.8,fa;q=0.6,sv;q=0.4",
    "HTTP_AUTHORIZATION": "Bearer eyJhbGciOiJSUzI1NiIsInR5cCIgOiAiSldUIiwia2lkIiA6ICJoc1h6Ri1XaHNjRDNQakdfMHVBMW9yYmhob3RuYmRMQTJVQ1BLMWtNQ25RIn0.edyJqdGkiddOiJjY2dY5MzM4Zi02dYThjdLTQyNmdMtOGdJiZC0yYdWIxYjU1ZmdM5ZmYiLCJldeHAiOjE1MTEyOTIwNTUsIm5iZiI6MCwiaWF0IjoxNTExMjg4NDU1LCJdpc3MiOiJoddHRwczovL2VjMi01Mi03Mi03MS0yMjkuY29tcHV0ZS0xLmFtYXpdvbmF3cyd5jb206ODQ0My9hdXRoL3JlYWxtcy9kZW1vX3Byb2plY3Rdfc2YdiLCJhdWQiOiIzNzlmdYmVlYidIsInN1YiId6IjQzMd2U3MTgyLWFhOTgtNDAyYy1iN2NmLTM1ZTZhYjhmYTkyMiIsInR5cCI6IkJlYXJlciIsdImF6cCI6IjM3OWZiZWViIiwibm9uY2UiOdiIwZDcyZDddMi0xZGJmLTd2NjMtODd2Ny0zYdmUyNGZiZmIzMDMiLCJhdXRoX3RpbWdiOjE1MTEyODg0NDgsInNlc3Npb25fc3RhdGUiOiI5NjU1ZWQ5Mi1mNGU1LTRiNWMtdGYwZS0zZjEyZmRlNzRkMDEiLCJhY3IiOiIxIiwiY2xpZW50X3Nlc3Npb24iOiJkNzExYzUzYS00NTllLTQwYTEtYjAzMy0wMzM2NjI0NjRmMGMiLCJhbGxvd2VkLW9yaWdpbnMiOlsiaHR0cDovL2xvY2FsaG9zdDozMDAwIl0sInJlYWxtX2FjY2VzcyI6eyJyb2xlcyI6WyJ1bWFfYXV0aG9yaXphdGlvbiJdfSwicmVzb3VyY2VfYWNjZXNzIjp7ImRlbW9fcHJvamVjdF9zZiI6eyJyb2xlcyI6WyJ0ZXN0ZXIiXX0sImFjY291bnQiOnsicm9sZXMiOlsibWFuYWdlLWFjY291bnQiLCJ2aWV3LXByb2ZpbGUiXX19LCJuYW1lIjoidXNlciBvbmUiLCJwcmVmZXJyZWRfdXNlcm5hbWUiOiJ1c2VyMSIsImdpdmVuX25hbWUiOiJ1c2VyIiwiZmFtaWx5X25hbWUiOiJvbmUiLCJlbWFpbCI6InVzZXIxQGxldnZlbC5pbyJ9.vEotb2OEiVUsQA7taHadC6jM1UEGdzHpeGzxC__5d9eKpC1WAA424mp7_FZfSmcBEY8nRz6uFybDE4T_cYNg9y0uBg27VasZcnQVWpp68Ol6adnA9q3kjOBep46s2iBqc7PUzw0K6_QEps7mQhmt3C2tsWSD231XGZ27GnA7FIB_ScR7_9c5-PXci8lP5EX1z-uIH0rxRGTmyIulGsk7867KMS1qFF5KPUMPxrNbXeTH0rxEMPn3C1-uSyFirlG2g-YfVQXgBUQ6SxvHATYQrKGkCQ01udHkgicKT9vZgPn5atMkSme1Lx3Kg8H3-pM7GIGHdempm2QOKnSoVwxGlw",
    "HTTP_ORIGIN": "http://editor2.swagger.io",
    "HTTP_REFERER": "http://editor2.swagger.io/",
    "HTTP_USER_AGENT": "Mozilla/5.0 (X11; Fedora; Linux x86_64) AppleWebKit/537.36 (KHTML, like Gecko) Chrome/56.0.2924.87 Safari/537.36",
    "HTTP_X_3SCALE_PROXY_SECRET_TOKEN": "Shared_secret_sent_from_proxy_to_API_backend_8256d9c54eedfd9c",
    "HTTP_X_REAL_IP": "1.1.1.1",
    "HTTP_X_FORWARDED_FOR": "2.2.2.2, 3.3.3.3",
    "HTTP_X_FORWARDED_HOST": "echo-api.3scale.net",
    "HTTP_X_FORWARDED_PORT": "443",
    "HTTP_X_FORWARDED_PROTO": "https",
    "HTTP_FORWARDED": "for=1.1.1.1;host=echo-api.3scale.net;proto=https"
  },
  "uuid": "f8577973-d330-44ce-a314-da3948b8335d"
}
That concludes our tutorial.
Image: Pattern / oatsy40