
This post outlines how to setup an Azure Active Directory tenant with a Pay-As-You-Go or Free subscription (which only lasts for 30 days). This post is an ancillary post that gives the AAD configuration details needed for the Apigee and Azure Active Directory Integration — A JWT Story post to function properly.
Some assumptions.
- We will initially create a Windows Live account to get into the Azure Portal.
- We will have a domain that is registered in our name and we have the ability to update the DNS information for (in particular, text records).
- The test users and admin accounts will have corresponding email accounts.
- The upn of each user will map to the email address.
Some warnings:
- Any real world application security model (whether for SPA, Mobile App, Web Application, etc) needs to be carefully thought through. This series of blog posts I’ve written on the topic won’t replace that.
- There are many different use cases for OAuth2. This is one of them. If yours looks exactly like this, you are likely doing something wrong — this is telling a very simple story.
- This example is what a typical mobile app client and API it may invoke could look like. It could also look quite different from this.
- The test script that is used here uses a Resource Owner Password Grant. A mobile app or SPA app would likely use one of the OAuth2 Authorization Grants that utilize an interactive login. More on this topic in another post.
- This post walks you through the setup of a simple delegation and consent scenario. These are complex topics in the identity world that will each be their own blog post in the future.
- The applications, users, and tenant that were created as part of this example were deleted shortly after I finished writing this blog post.
First, create a Windows Live Account here. It isn’t necessary for this account to be part of the domain that we are going to register in the AAD tenant later, but I do it for consistency.
Click the Account Center link.
On the login Page, click the “Get a new account” link.
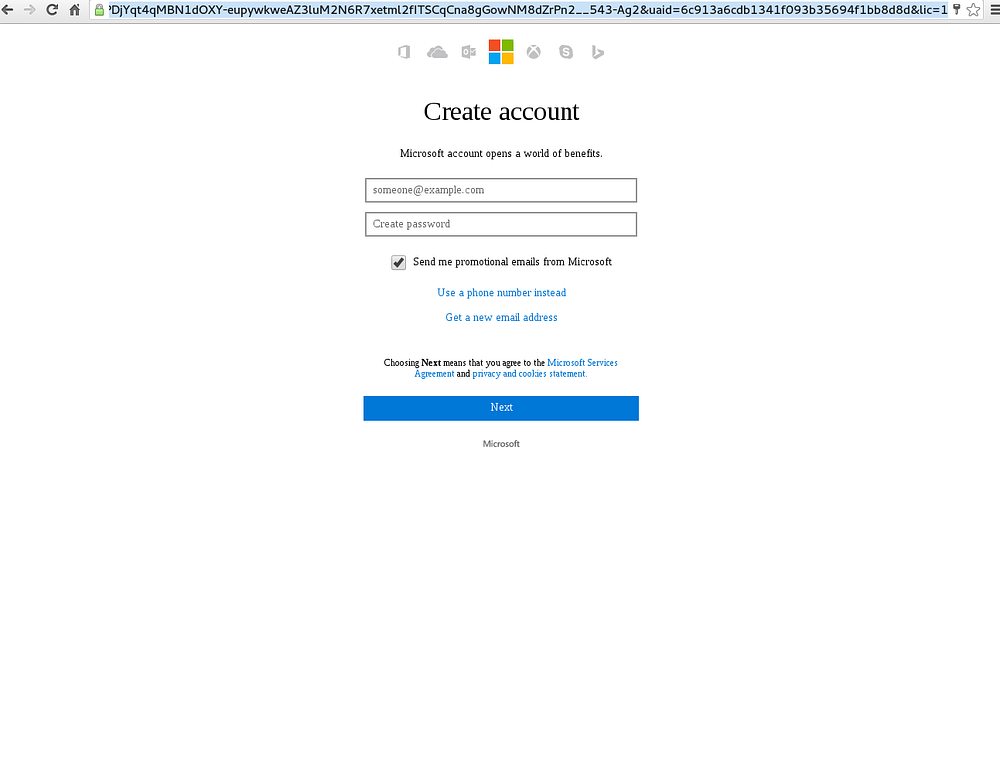
Follow the instructions you are presented with to create a new account. The account that you create should correspond to an email address that you control. For my example in the Apigee & Azure AD Integration blog post, I used an email account that is hosted with Google Mail for Business.
This account will be given a Free Trial subscription that will have access to many of the features of Azure — with notable limits.
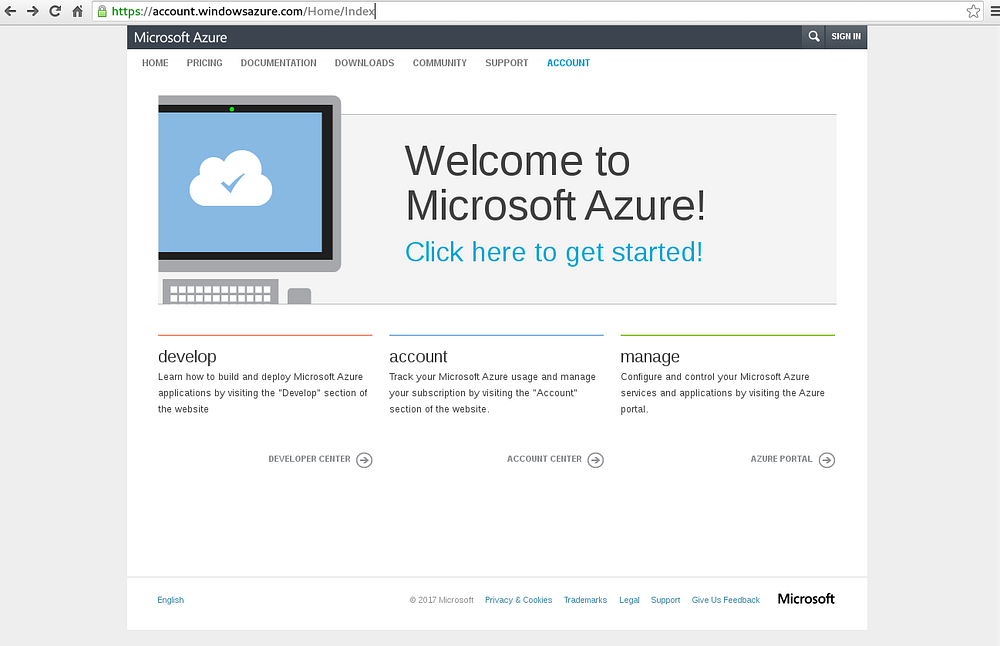
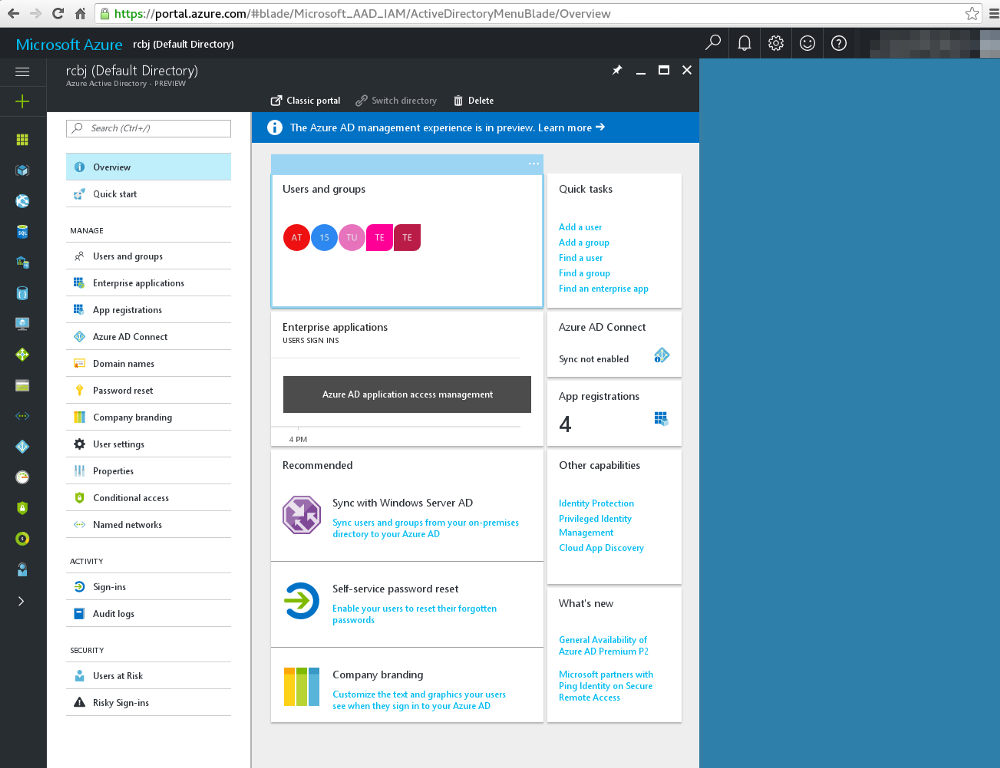
Go to the the Azure Portal. If you haven’t logged in yet, you will be prompted to do so now. You will see a page similar to:
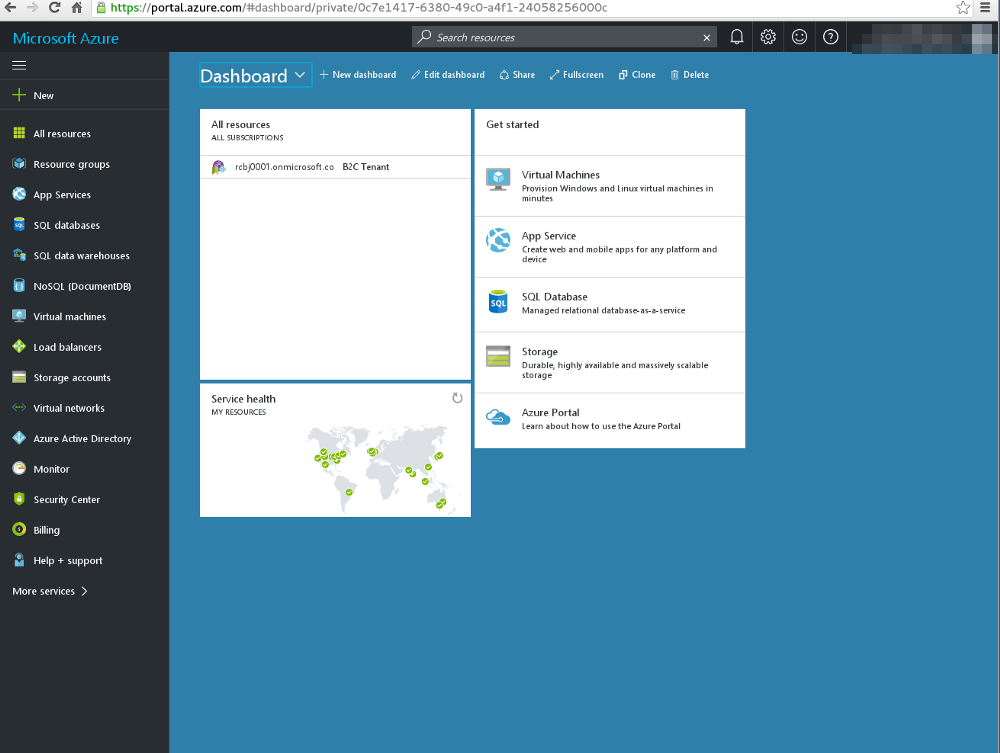
Note, if you are setting this up from scratch, you won’t have anything listed in the All Resources pane.
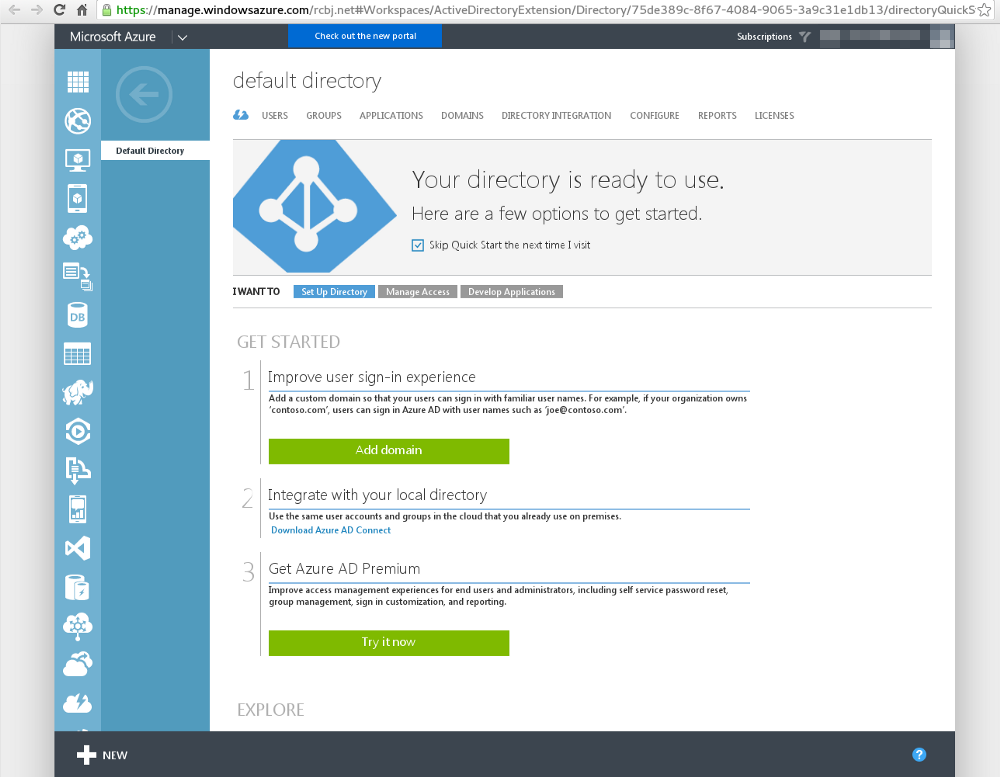
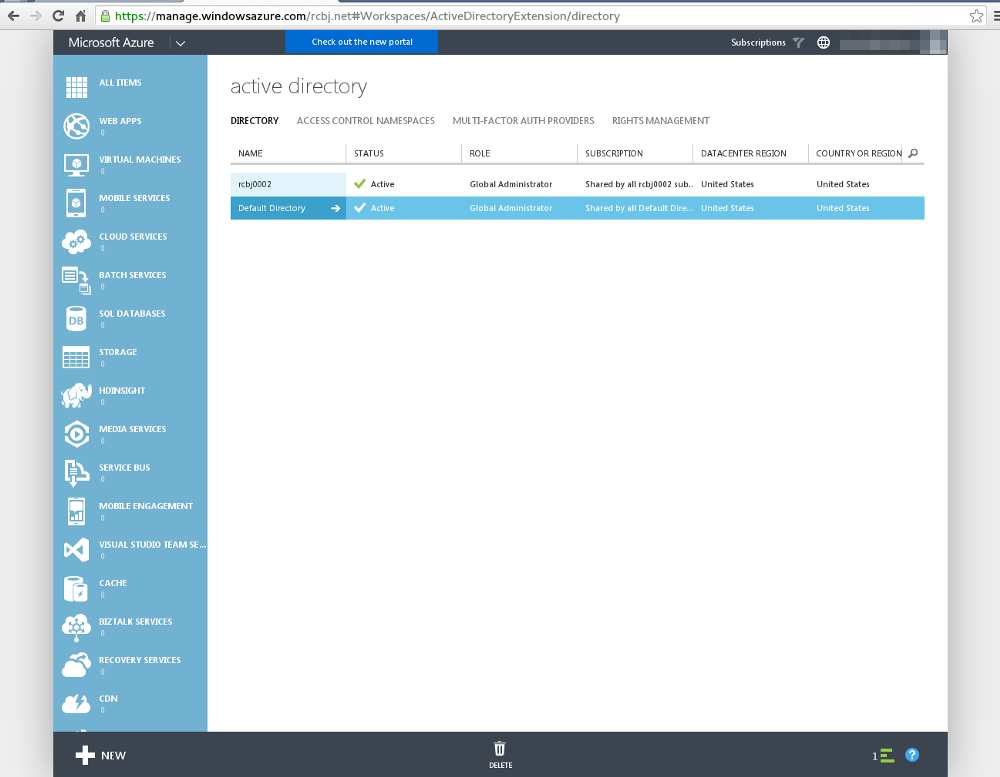
There is a default directory that can be used, but we are going to create a new directory. Click on the Azure Active Directory button on the left hand tab.
Click the Classic Portal link at the top center of this screen. We are going to do this setup in the Classic Portal.
Click the New button at the bottom, left hand corner.
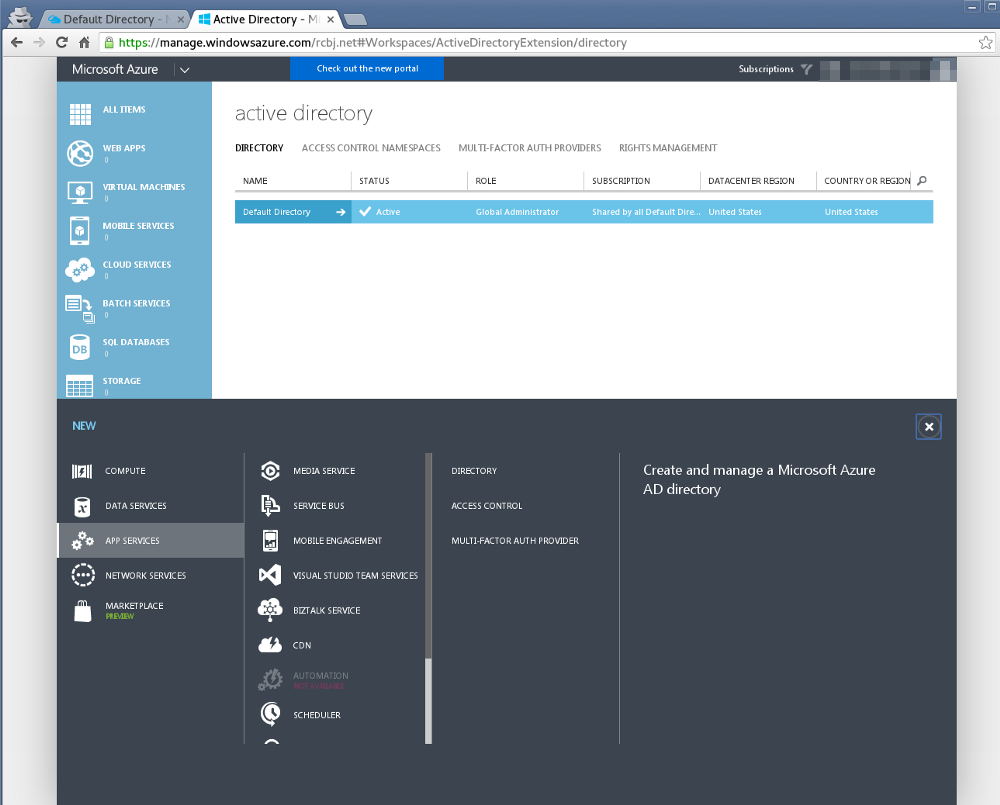
Click the “Directory” link in the second column from the right.

Now, click the Custom Create link.
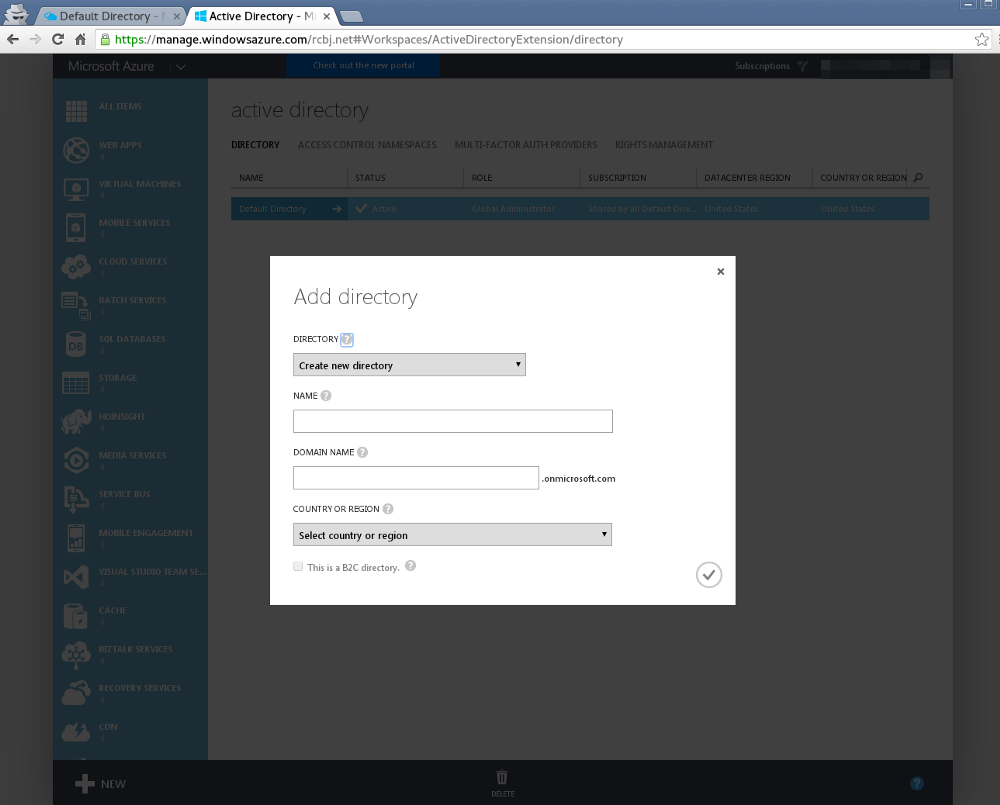
Leave the option “Create new directory”.
Give the directory a name.
Give the directory a domain name under “.onmicrosoft.com”. A custom domain can be added later.
Select “United States” from the Country or Region drop down.
Then, click the check box icon in the lower, right-hand side of the dialogue box.
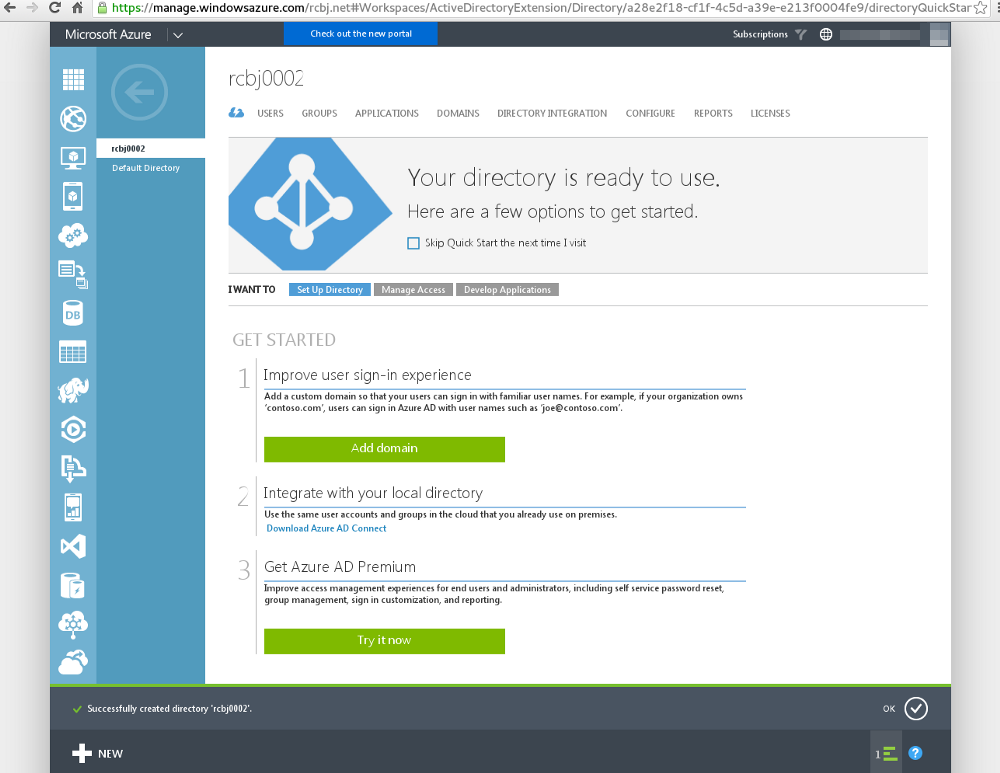
If you click on the green bar icon in the lower, right-hand corner, you will see status messages about the creation of the new directory. The image above shows a directory being created called rcbj0002 — it was created successfully.
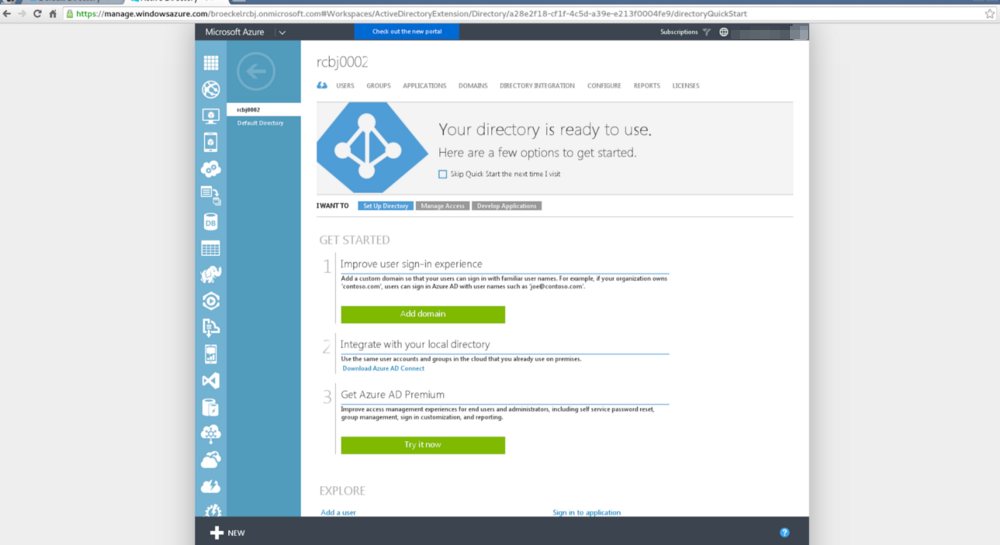
Next, click on the rcbj0002 directory link.
Click the big green “Add domain” button.
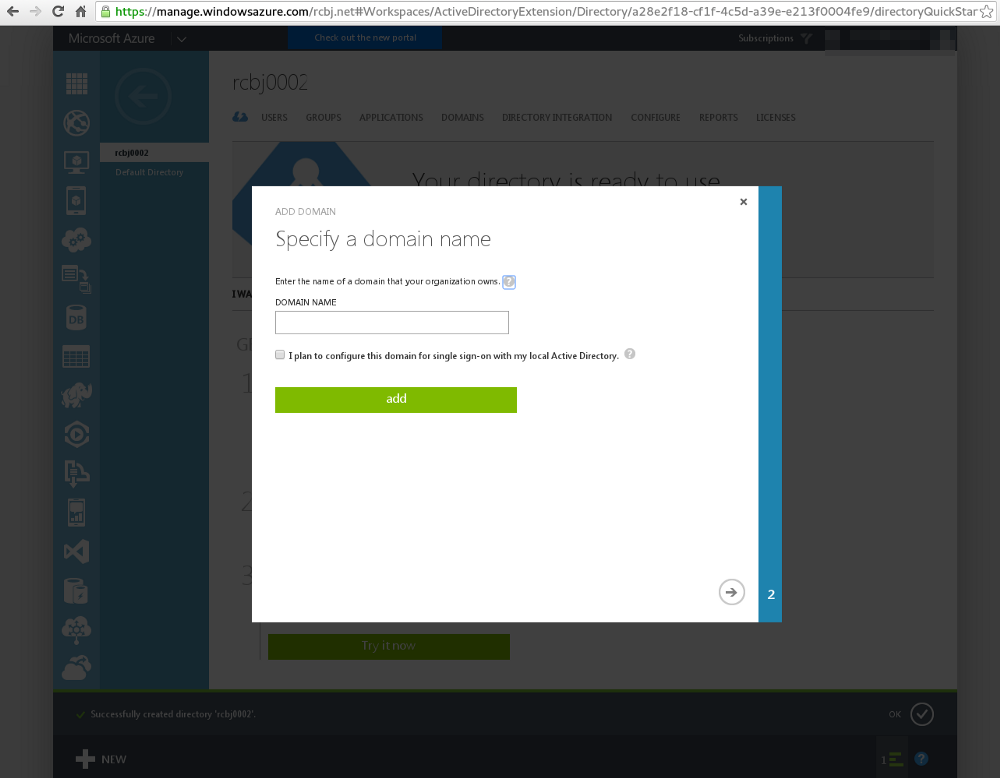
Enter a domain name that you control. For our purposes, we are not going to be setting up SSO with a local Active Directory domain. Though, this is a very common use case. In a later post, we will likely extend the work done here to do SSO with Google. Click the right arrow button in the lower, right-hand corner.
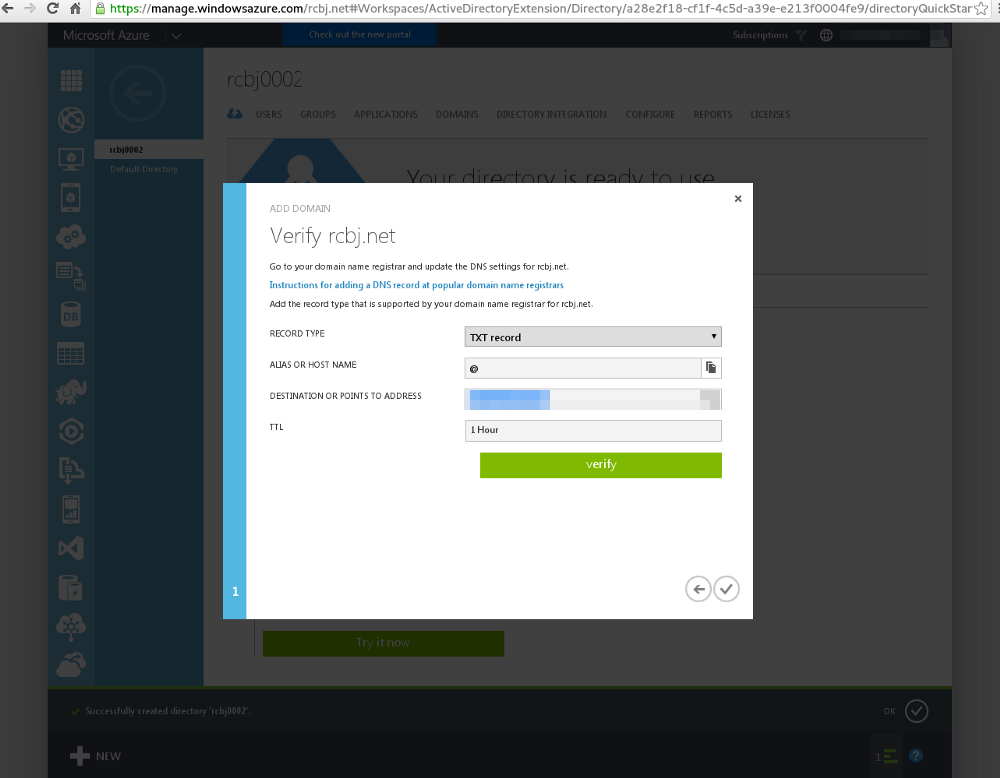
We are now being asked to add a DNS TXT record to the rcbj.net domain. The rcbj.net domain happens to be registered through godaddy.com. So, I had to go into their Domain Management application to add the DNS TXT record. The details will likely differ for your domain and are beyond the scope of this blog post.
After the TXT record was added, we can click the verify button.
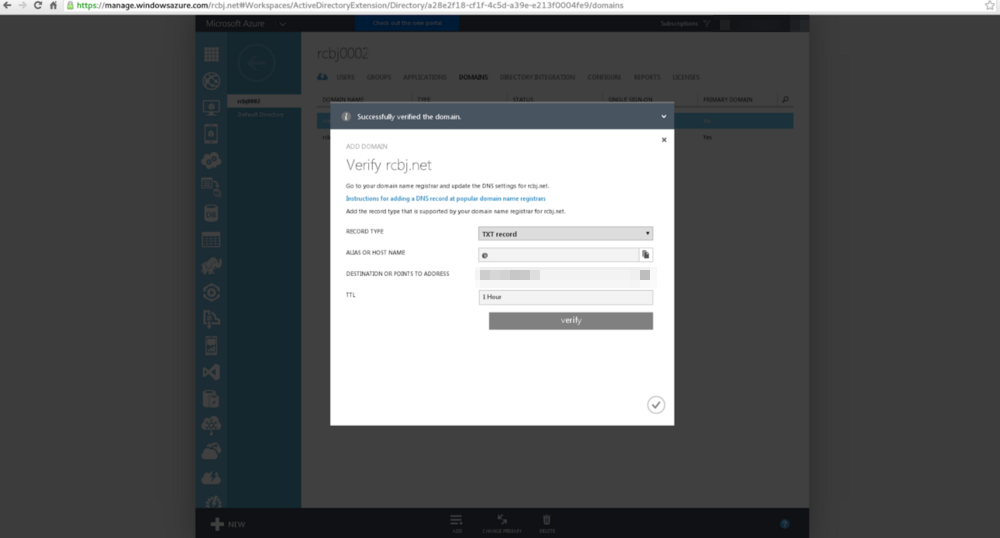
Click the green check mark in the lower right-hand corner.
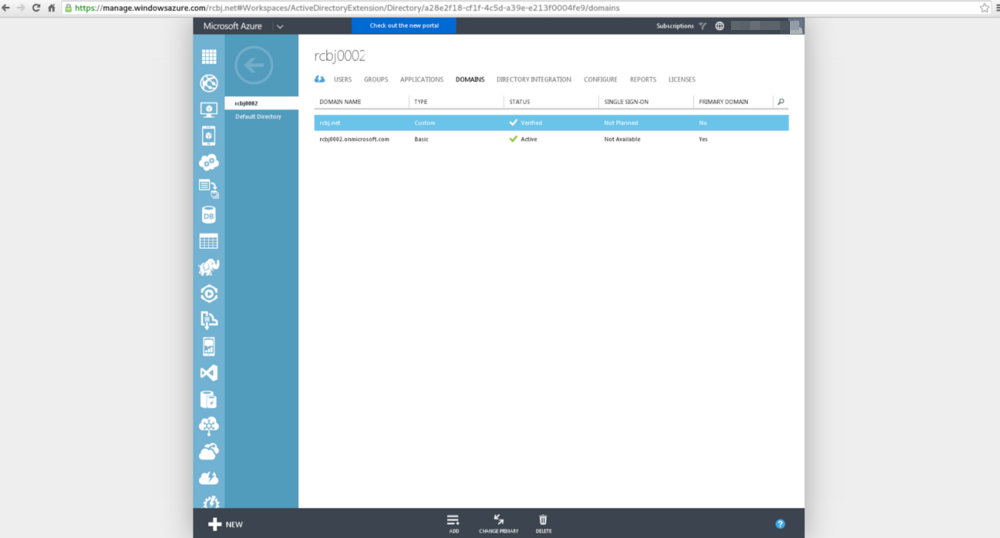
You can see that the rcbj.net domain is now verified in this AAD tenant.
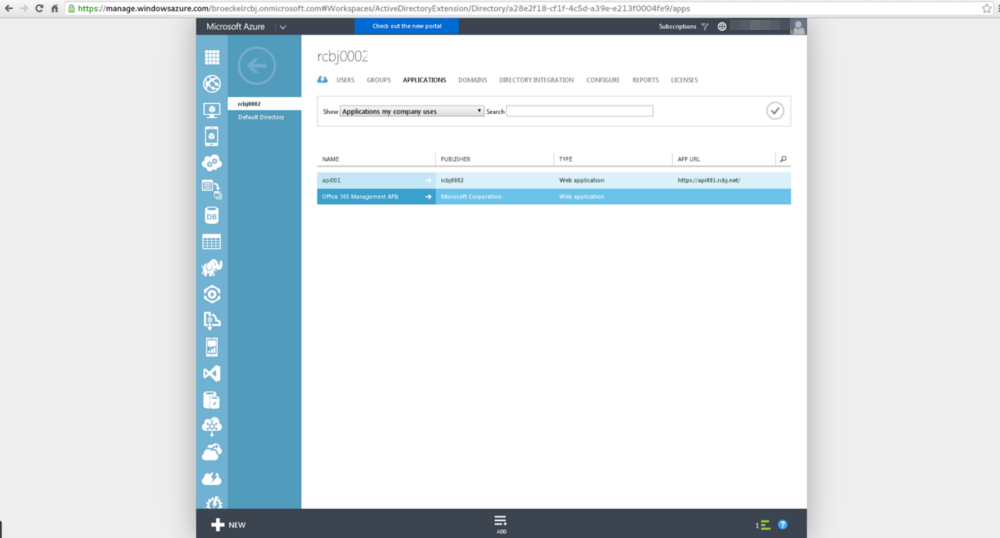
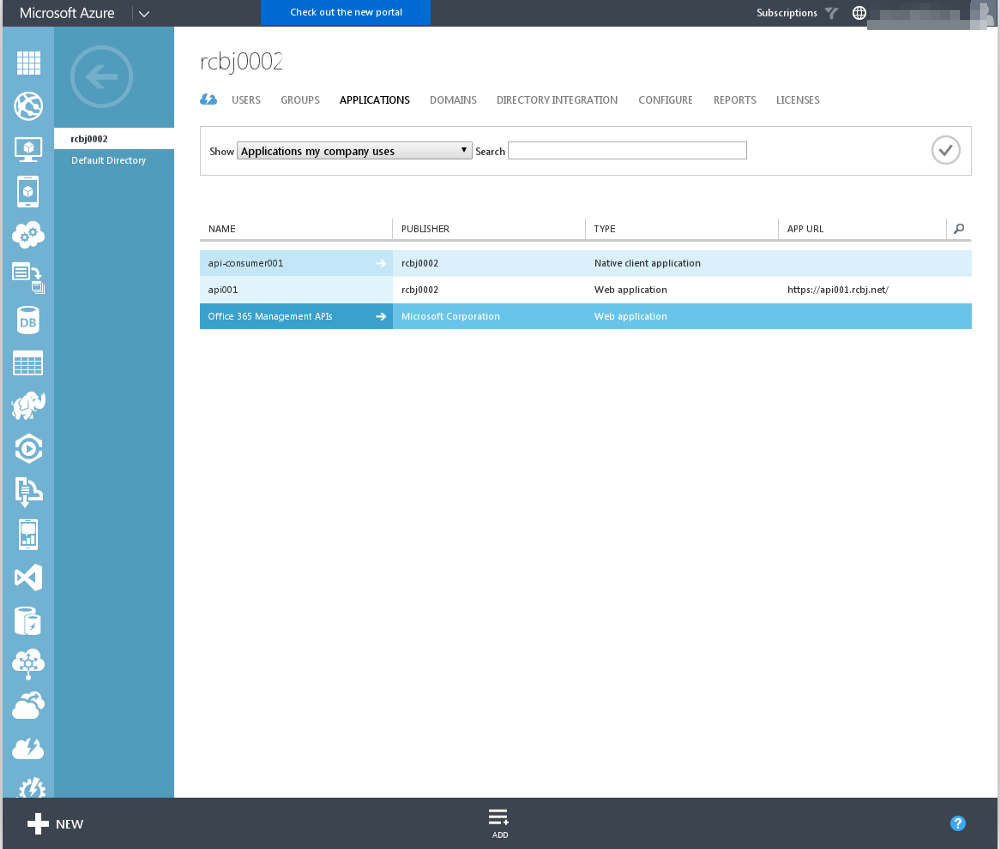
Next, we are going to create two application definitions: an API Consumer and an API Provider. To begin, click on the “rcbj0002” Directory link.
Click on the Applications link at the top.
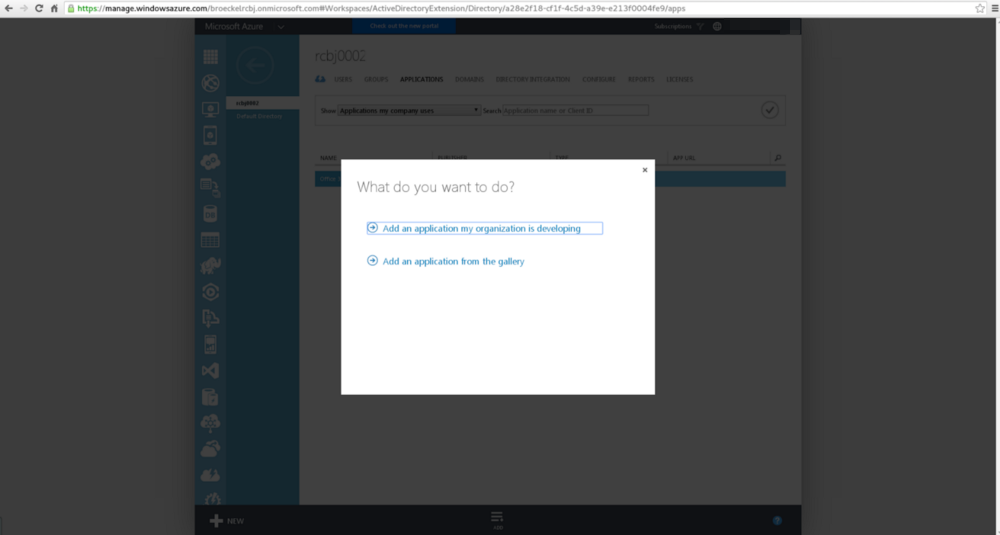
Click the “Add” link in the bottom center.

Click the “Add an application my organization is developing”
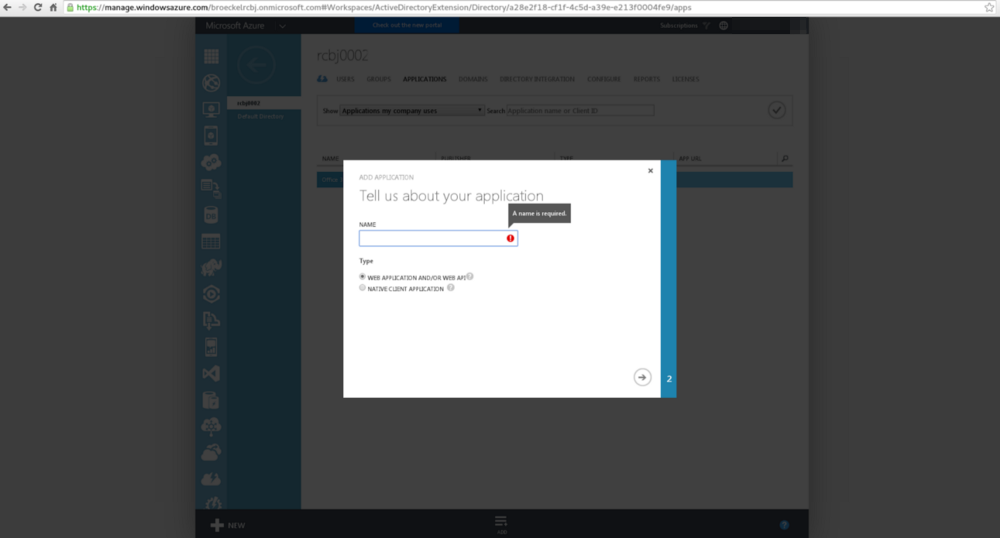
Enter the name of the API Provider. Let’s call it “api001”; though, the name is rather arbitrary. For type, choose the radio button next to “WEB APPLICATION AND/OR WEB API”. Click the next arrow button in the lower, right-hand corner.
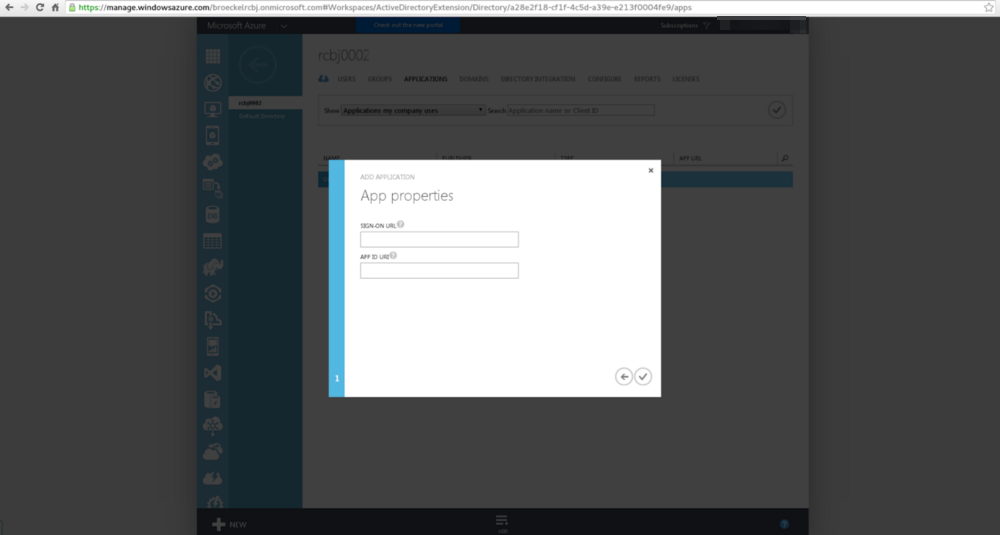
In the Sign-On URL field, enter “https://api001.rcbj.net/”.
In the AppID URI field, enter “https://api001.rcbj.net/”.
Click the check box in the lower, right-hand corner.
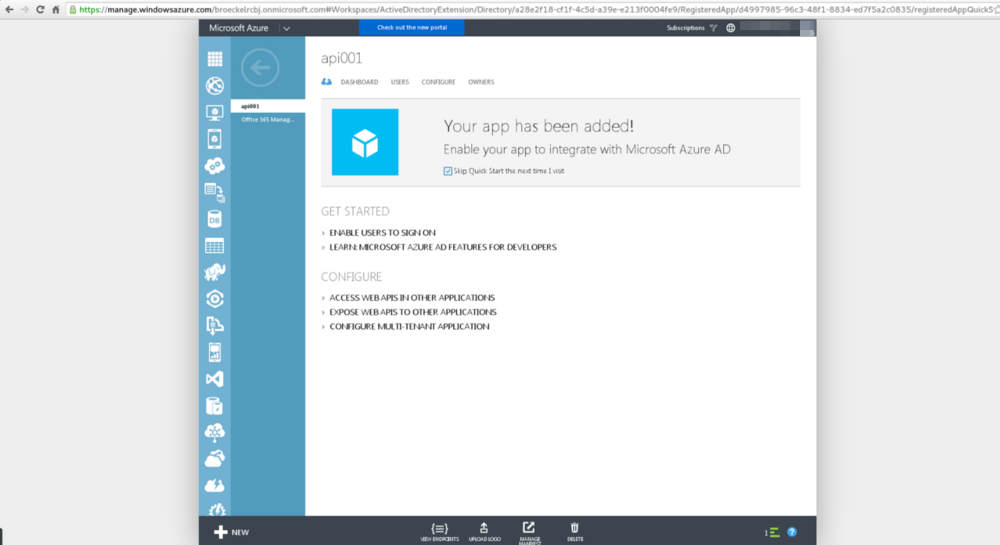
After a few moments, you should see a screen similar to the above reporting the application was created successfully.
Click the Configure tab.
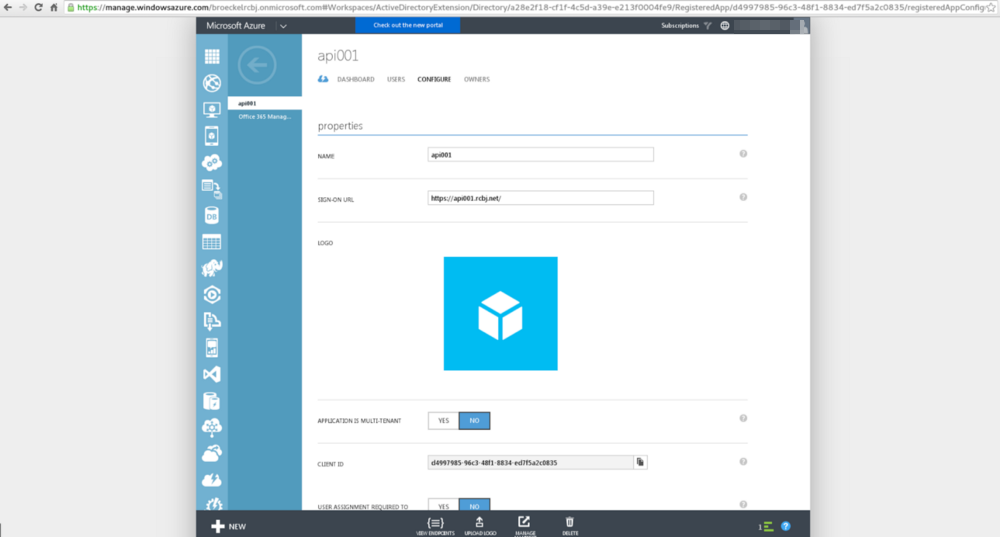
Take note of the following fields:
- Name
- Sign-On URL
- Client ID
For the example presented here, these values are:
Name: api001
Client ID: d4997985–96c3–48f1–8834-ed7f5a2c0835
Click the back button in the upper, left-hand corner.
Once again click the Add link at the bottom, center, to add the API Consumer application definition.
Click the “Add an application my organization is developing”

Enter the name of the API Provider. Let’s call it “api-consumer001”; though, the name is rather arbitrary. For type, choose the radio button next to “NATIVE CLIENT APPLICATION”. Click the next arrow button in the lower, right-hand corner.

In the Sign-On URL field, enter “https://api-consumer001.rcbj.net/”.
In the AppID URI field, enter “https://api-consumer001.rcbj.net/”.
Click the check box in the lower, right-hand corner.
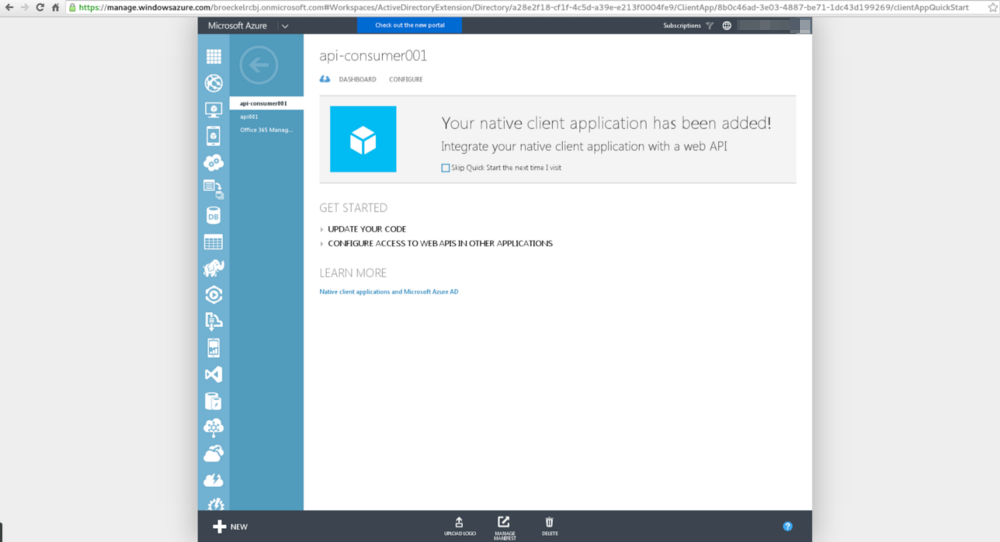
After a few moments, you should see a screen similar to the above reporting the application was created successfully.
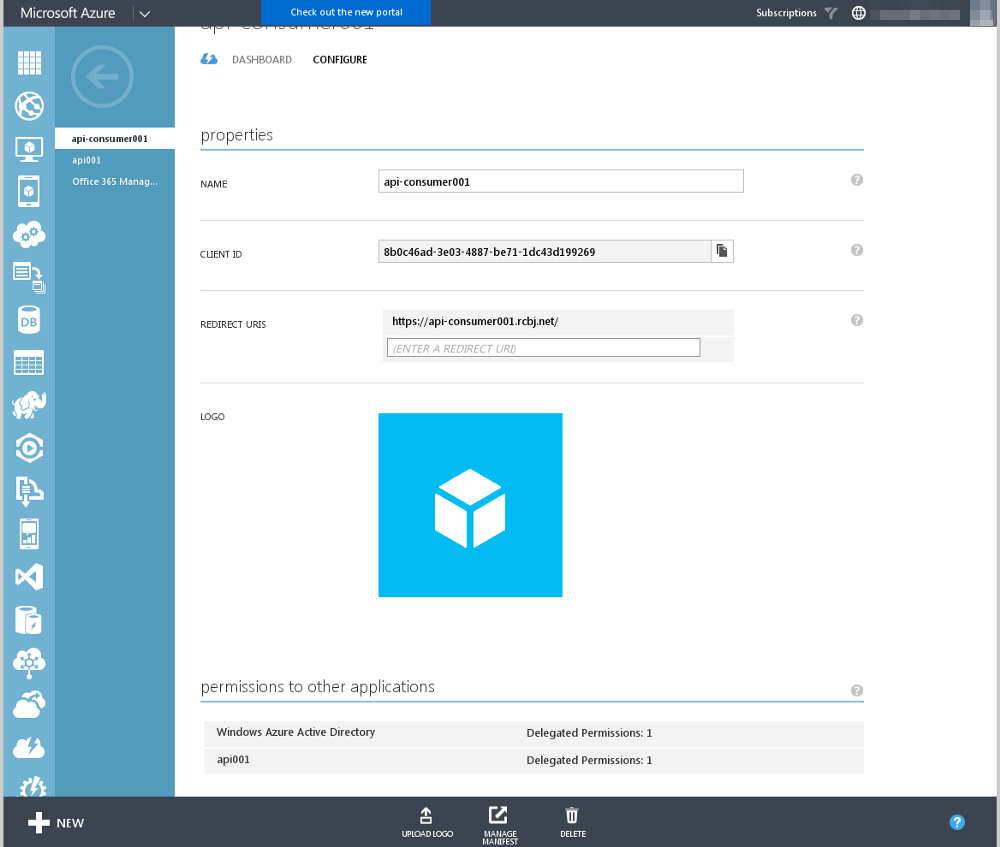
Click the Configure button.
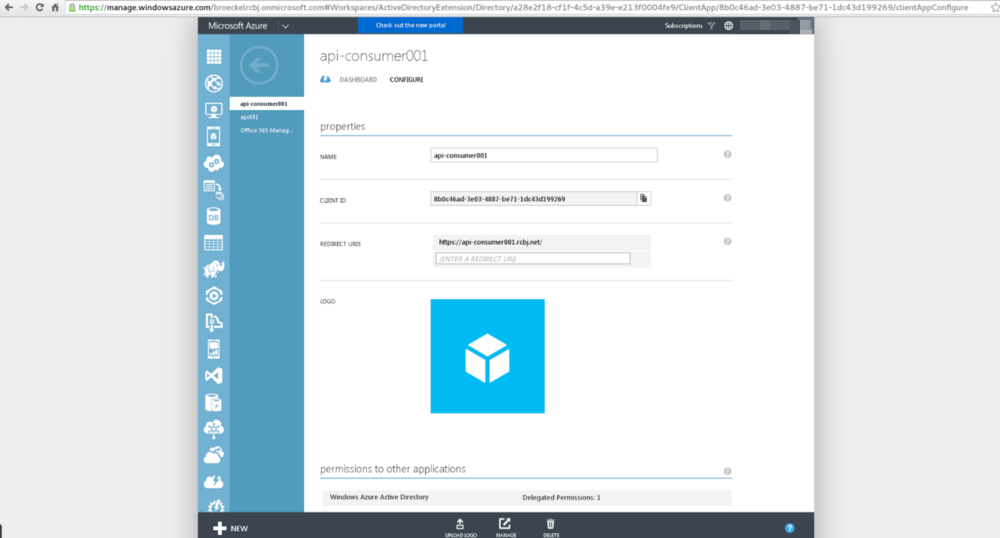
Take note of the following fields:
- Name
- Client ID
For this example, these values are in the table below.
Name: api-consumer001
Client ID: 8b0c46ad-3e03–4887-be71–1dc43d199269
URL: https://api-consumer001.rcbj.net/
Scroll down to the “permission to other applications” section.
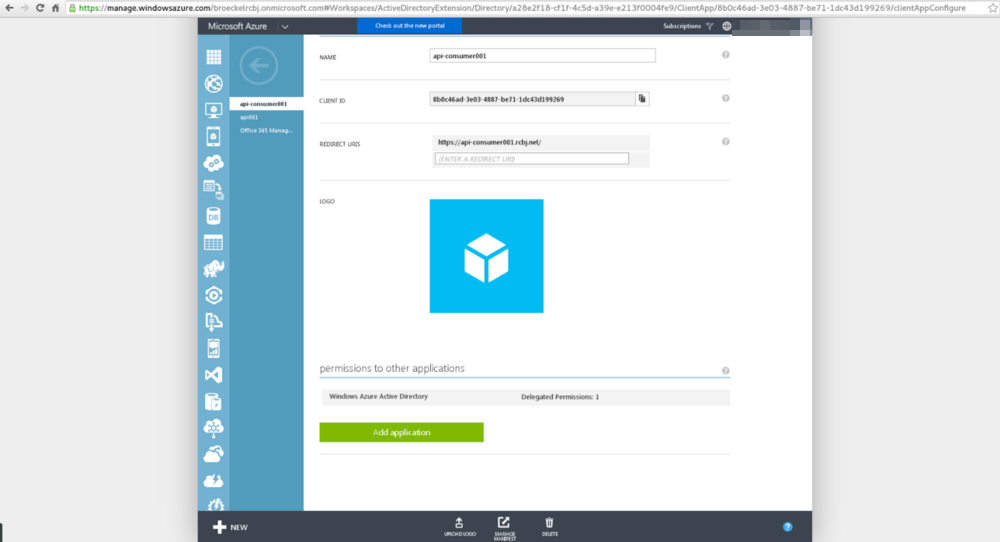
Click the “Add application” button.
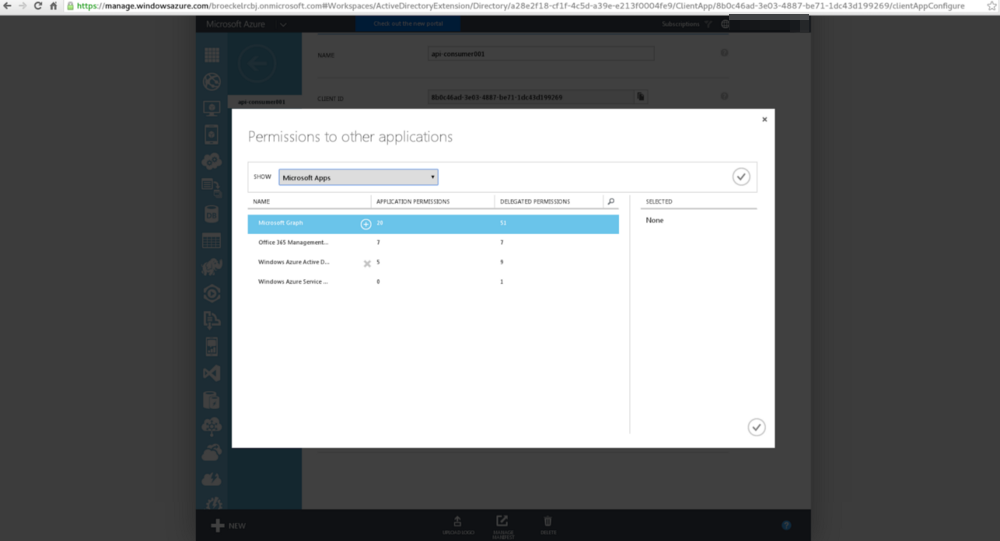
In the drop down, select “Microsoft Apps”.
In the “Starting with” field, type “api” or whatever the first few letters are of the name you used for your API application definition.
Click the green check box.
Select the API application from the list.
Click the + in a circle next to the application name.
Click the green check box in the lower, right-hand corner.
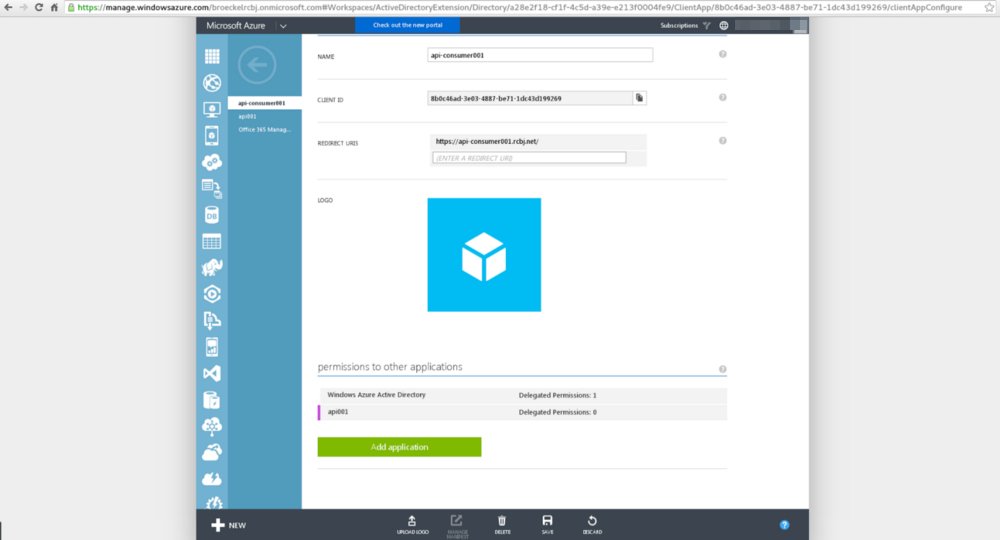
Click the “Delegated Permissions: 0” drop down next to the name of the application you just added.
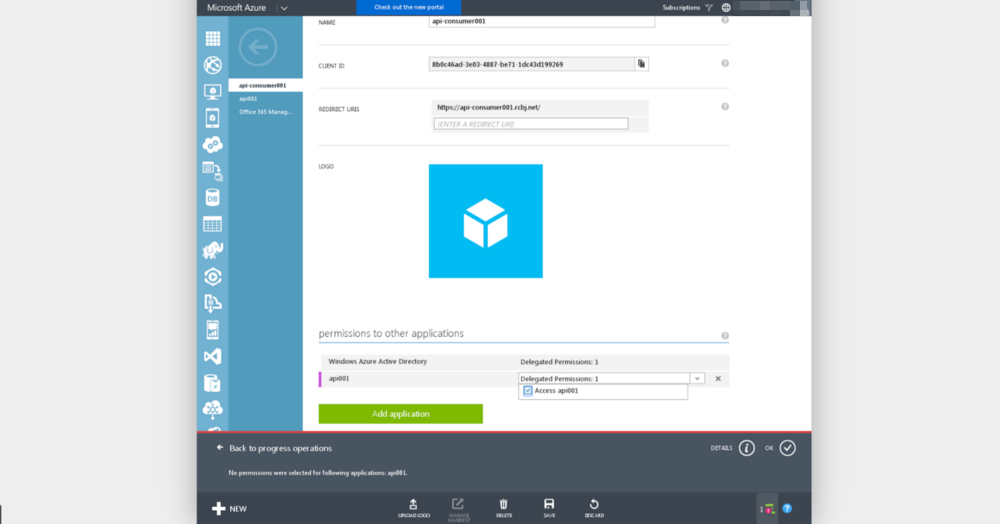
Click the checkbox next to “Access api001” (or whatever the application name is).
Click the Save icon at the bottom center of the screen.
You will see the application in the list of “permissions to other applications” with one delegated permission listed. You will also see a message in the status icon in the lower, right-hand corner.
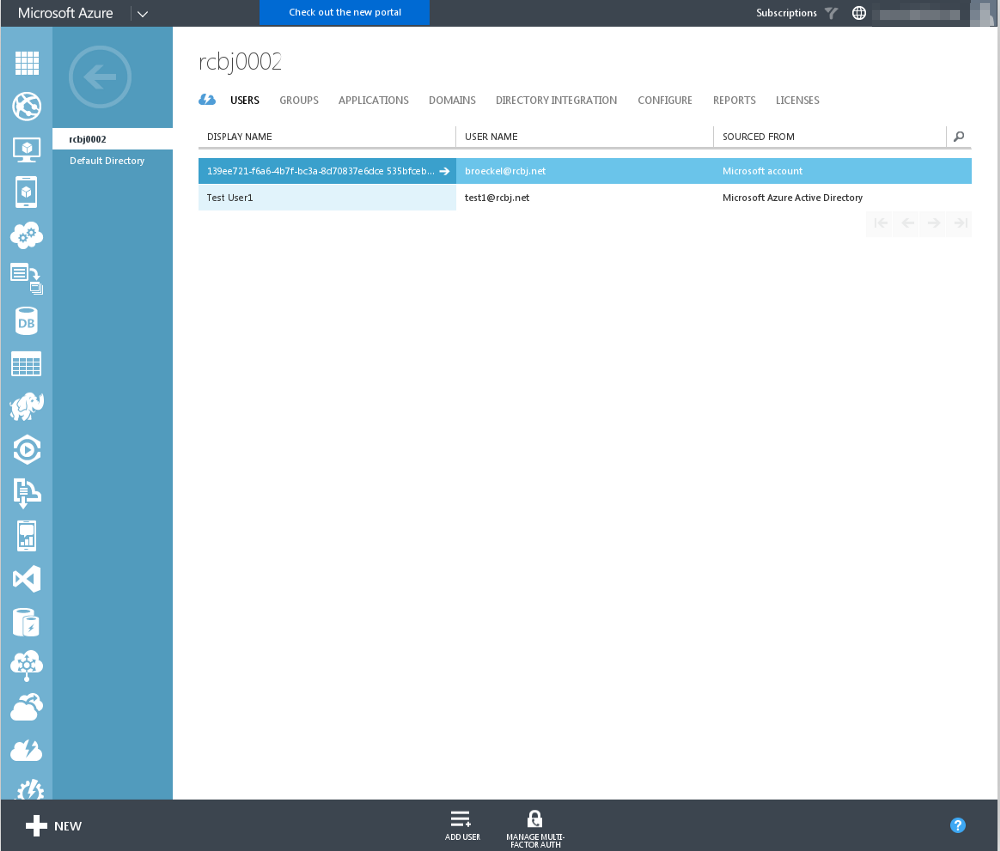
Now, we need to add two users to this tenant: a global administrator and a test user. Click the back button in the upper, left-hand corner.
Click the Users tab.

Click the “ADD USER” icon at the bottom of the screen.
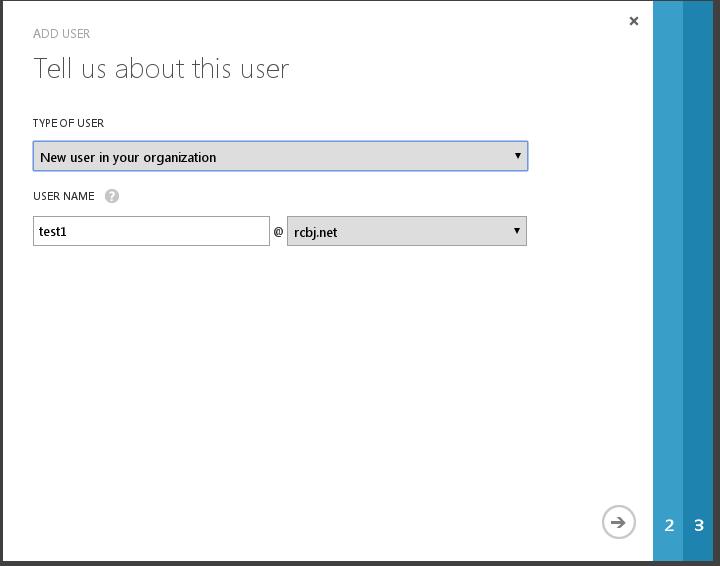
From the “Type of User” dropdown menu, choose “New user in your organization”.
In the username field, add “test1” as the username.
In the suffix dropdown, choose “rcbj.net” or whatever domain you registered above.
Click the next arrow button.
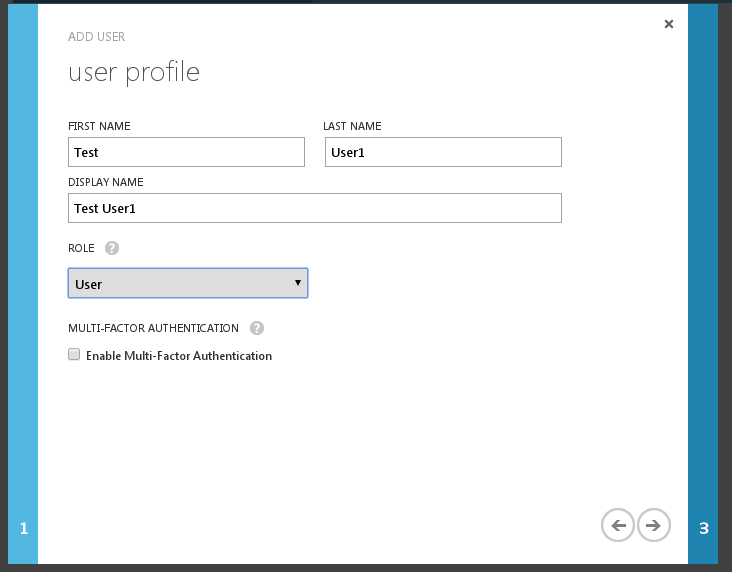
Add the First Name and Last Name.
Add the Display Name.
Use the Role of User.
Do NOT enable Multi-Factor Authentication.
Click the next arrow button.
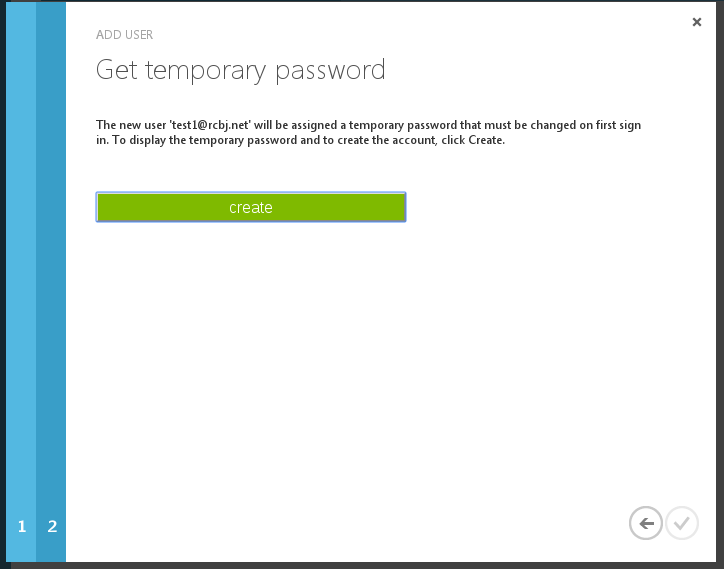
Click the Create button.
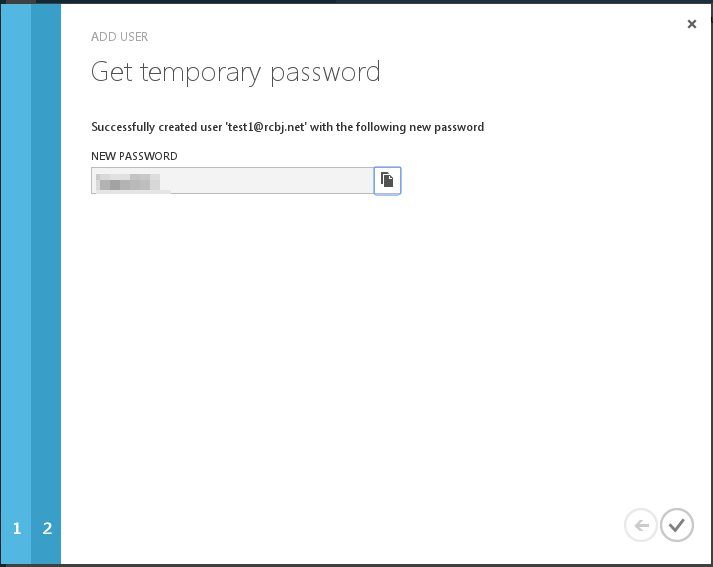
Click the check mark in the lower, right-hand corner.
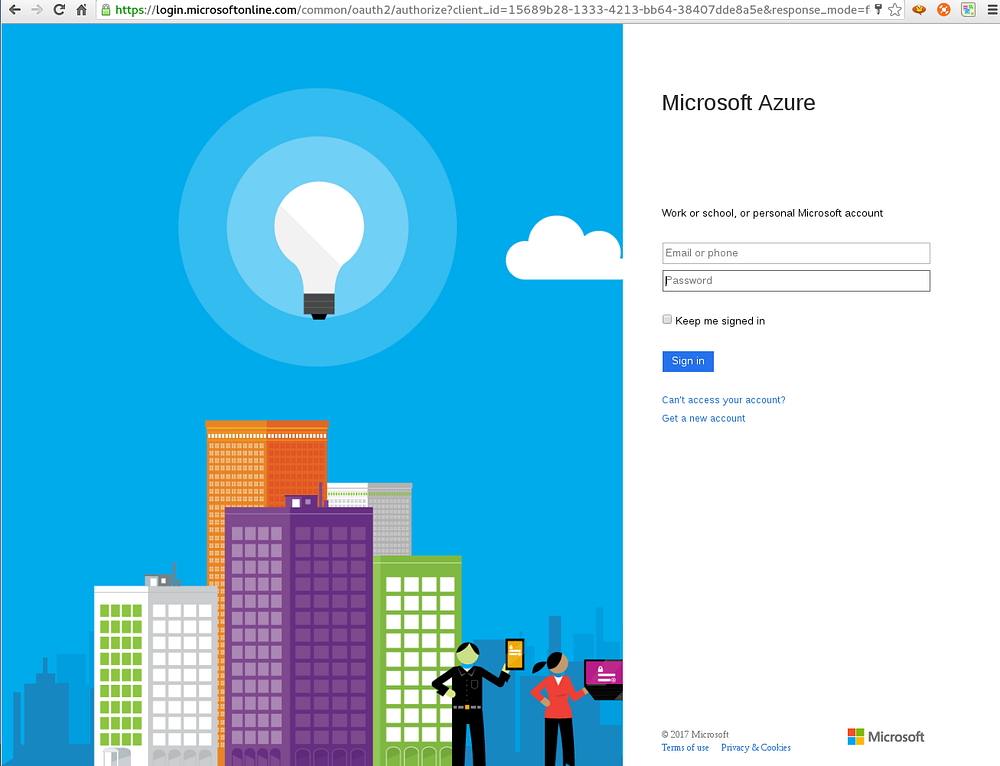
Now, log into https://login.microsoftonline.com as the test user that was just created.
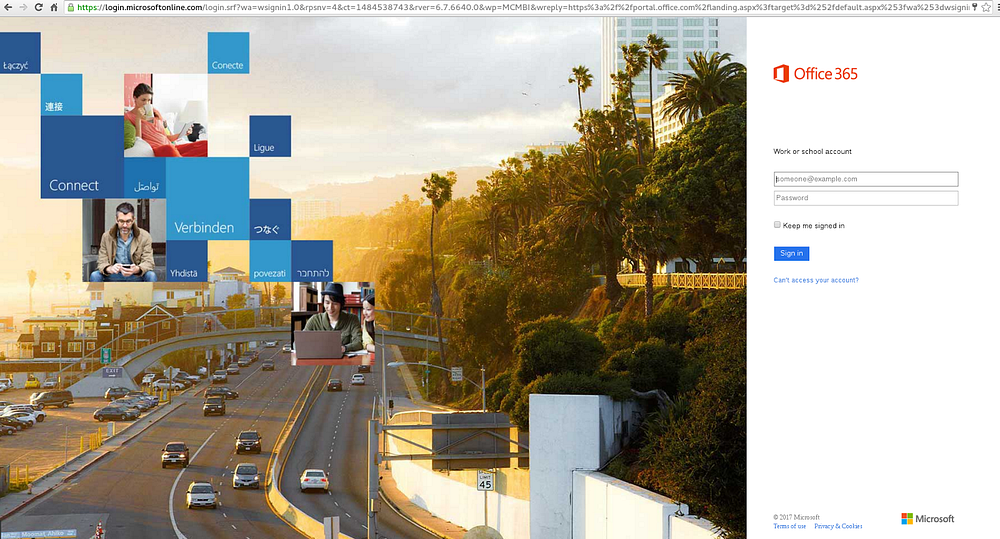
Enter the userid.
Wait for the screen to refresh.
Enter the password.
Click Sign In.
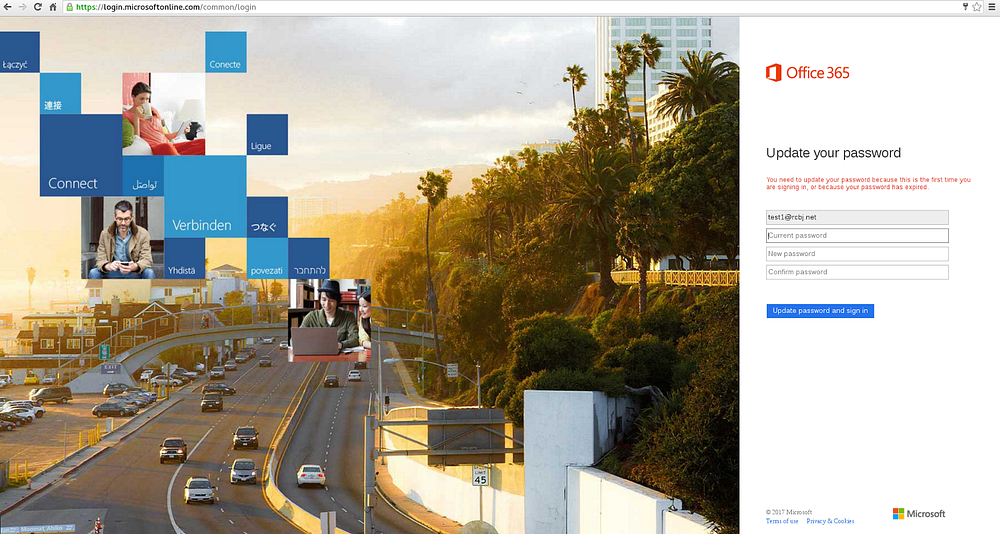
Change the password to whatever you see fit.
Click the “Update password and sign in” button.

You will see something similar to the screen above. We are done with this user for now.
Now, create a second user by going through all the steps outlined above for creating a test user. But, this time give the user the role of global administrator.
Go to the main directory screen.
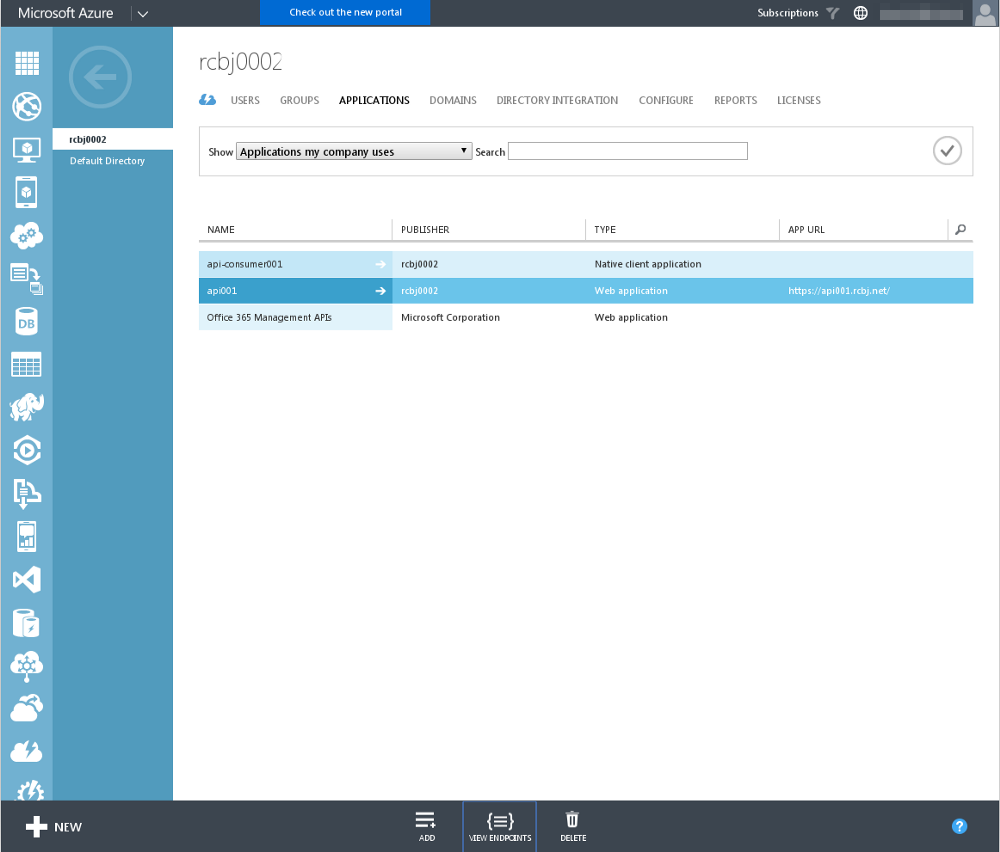
Click the “View Endpoints” icon.
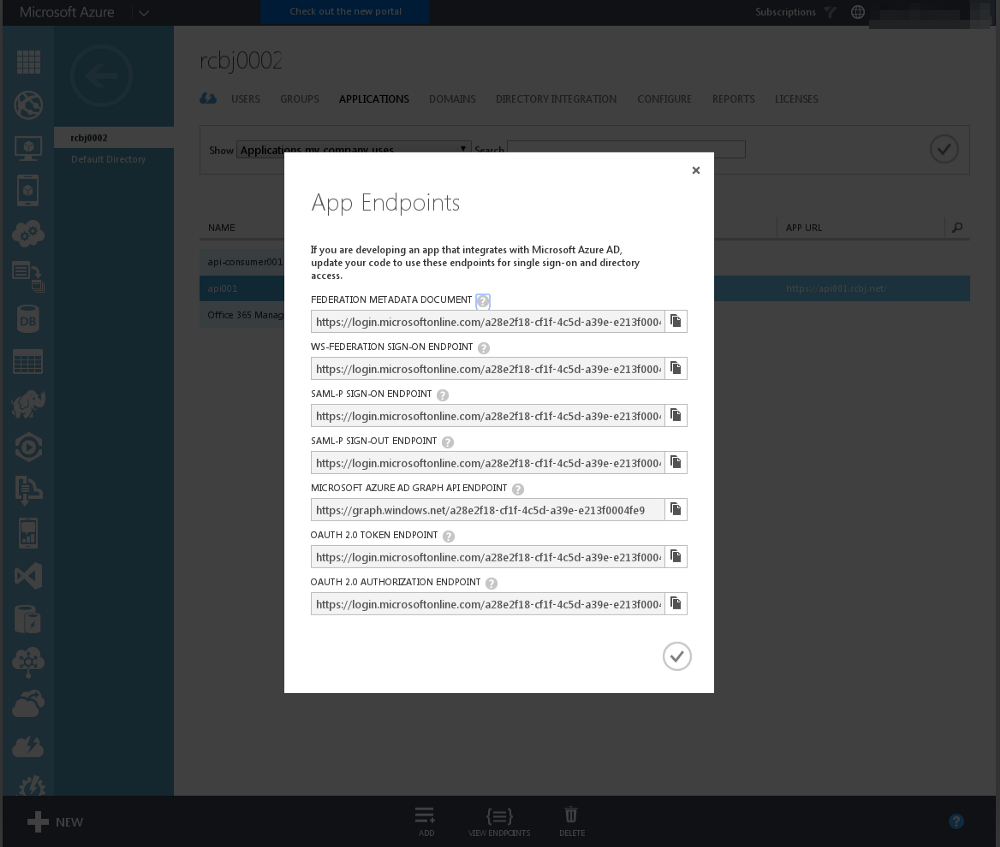
The tenant ID for the tenant we have created in this example is:
a28e2f18-cf1f-4c5d-a39e-e213f0004fe9
The federation metadata endpoint is:
https://login.microsoftonline.com/a28e2f18-cf1f-4c5d-a39e-e213f0004fe9/federationmetadata/2007-06/federationmetadata.xml
The final step to configure this tenant and applications to work as described in the Apigee and Azure Active Directory Integration — A JWT Story blog post is to grant administrator consent to this application for all users. This way, each individual user does not have to grant this consent. In some cases, this may be desirable. In enterprise IT, especially in the B2E and B2B identity spaces, it is likely that the data is owned by the company and thus this type of administrative consent is applicable and desirable.
Gathering the various pieces of information that we have collected along the way into one places yields:
Consumer App Client ID: 8b0c46ad-3e03–4887-be71–1dc43d199269
Consumer App URL: https://api-consumer001.rcbj.net/
API App client ID: https://api001.rcbj.net/
API App URL: d4997985–96c3–48f1–8834-ed7f5a2c0835
Tenant ID: a28e2f18-cf1f-4c5d-a39e-e213f0004fe9
All of this information can be fed into the Authorization Code Authorization Grant base-URL for AAD to generate:
https://login.windows.net/a28e2f18-cf1f-4c5d-a39e-e213f0004fe9/oauth2/authorize?response_type=code&client_id=8b0c46ad-3e03-4887-be71-1dc43d199269&resource=https://api001.rcbj.net/&redirect_uri=https://api-consumer001.rcbj.net/&state=12345&prompt=admin_consent
The “prompt=admin_consent” query parameter requests the user be prompted for admin consent.
Place the URL above into a browser window.
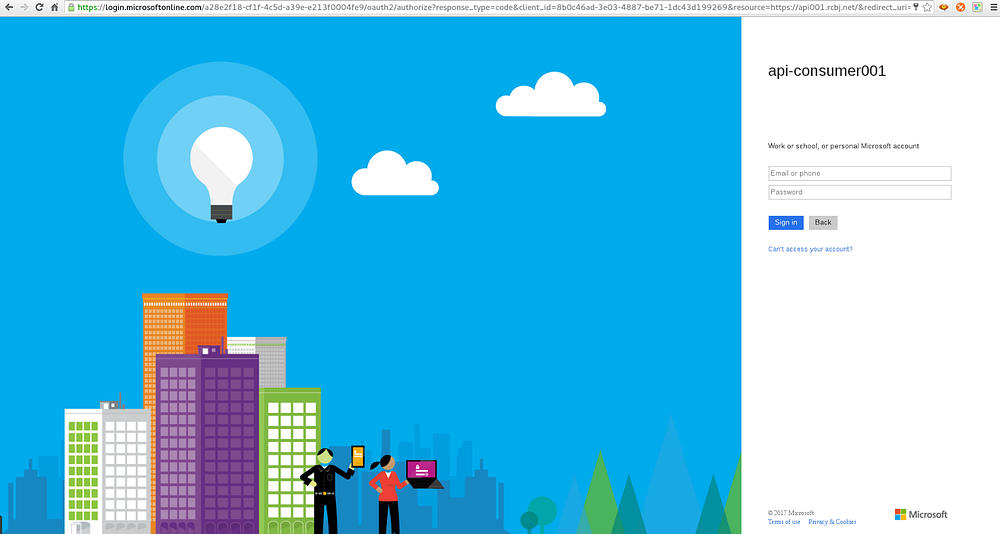
Enter the userid and password of the Global Administrator account that was created earlier.
Press Sign In.
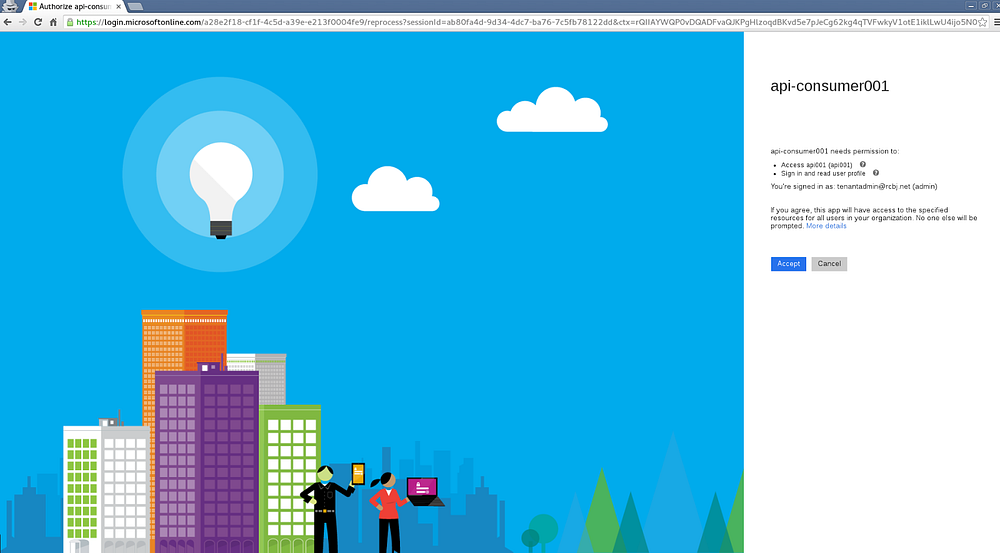
Click the Accept button.
If the URLs that were used in these applications were accessible internet endpoints (sometimes they are, sometimes they are not, that is a discussion for another time), then the admin user will be directed to the API endpoint. If these are not “real” endpoints, you can ignore everything that happens after clicking Accept.
Consent has now been granted for all applications.
If we update the test-client.sh script available in the github repositoryassociated with the Apigee side of these tutorials, to be:
#!/bin/bash
set -x
CLIENT_ID=8b0c46ad-3e03–4887-be71–1dc43d199269
RESOURCE_URL=https://api001.rcbj.net/
USERNAME_=test1@rcbj.net
PASSWORD_=”***************”
TENANT_ID=a28e2f18-cf1f-4c5d-a39e-e213f0004fe9
ASSERTION=`curl -X POST “https://login.microsoftonline.com/${TENANT_ID}/oauth2/token" -d “grant_type=password&client_id=${CLIENT_ID}&resource=${RESOURCE_URL}&username=${USERNAME_}&password=${PASSWORD_}” — insecure| awk -F”,” ‘{print $(NF-1)}’ | awk -F”:” ‘{print $2}’ | sed ‘s/\}//g’ | sed ‘s/\”//g’`
if [ -z “${ASSERTION}” ];
then
echo “ASSERTION is blank.”
exit 0
fi
echo “ASSERTION=${ASSERTION}”
A sample run of this script yields:
$ ./test.sh
+ CLIENT_ID=8b0c46ad-3e03–4887-be71–1dc43d199269
+ RESOURCE_URL=https://api001.rcbj.net/
+ USERNAME_=test1@rcbj.net
+ PASSWORD_=’**************************’
+ TENANT_ID=a28e2f18-cf1f-4c5d-a39e-e213f0004fe9
++ curl -X POST https://login.microsoftonline.com/a28e2f18-cf1f-4c5d-a39e-e213f0004fe9/oauth2/token -d ‘grant_type=password&client_id=8b0c46ad-3e03–4887-be71–1dc43d199269&resource=https://api001.rcbj.net/&username=test1@rcbj.net&password=*****************' — insecure
++ awk -F, ‘{print $(NF-1)}’
++ awk -F: ‘{print $2}’
++ sed ‘s/\}//g’
++ sed ‘s/\”//g’
% Total % Received % Xferd Average Speed Time Time Time Current
Dload Upload Total Spent Left Speed
100 2260 100 2117 100 143 4347 293 — : — : — — : — : — — : — : — 4347
+ ASSERTION=eyJ0eXAiOiJKV1QiLCJhbGciOiJSUzI1NiIsIng1dCI6Ilk0dWVLMm9hSU5RaVFiNVlFQlNZVnlEY3BBVSIsImtpZCI6Ilk0dWVLMm9hSU5RaVFiNVlFQlNZVnlEY3BBVSJ9.eyJhdWQiOiJodHRwczovL2FwaTAwMS5yY2JqLm5ldC8iLCJpc3MiOiJodHRwczovL3N0cy53aW5kb3dzLm5ldC9hMjhlMmYxOC1jZjFmLTRjNWQtYTM5ZS1lMjEzZjAwMDRmZTkvIiwiaWF0IjoxNDg0NTQ0NDMyLCJuYmYiOjE0ODQ1NDQ0MzIsImV4cCI6MTQ4NDU0ODMzMiwiYWNyIjoiMSIsImFtciI6WyJwd2QiXSwiYXBwaWQiOiI4YjBjNDZhZC0zZTAzLTQ4ODctYmU3MS0xZGM0M2QxOTkyNjkiLCJhcHBpZGFjciI6IjAiLCJmYW1pbHlfbmFtZSI6IlVzZXIxIiwiZ2l2ZW5fbmFtZSI6IlRlc3QiLCJpcGFkZHIiOiIyNC4yMC45Mi4xMzQiLCJuYW1lIjoiVGVzdCBVc2VyMSIsIm9pZCI6IjVlZDE3ZjI4LWE4NmItNDQzOC1hNWQ3LWRhYWE2ODk1YjczMyIsInBsYXRmIjoiMTQiLCJzY3AiOiJ1c2VyX2ltcGVyc29uYXRpb24iLCJzdWIiOiI4dGRYQjlfeXZXUDNBN0dRdUVvTFdHMmVOWTc2MEpyQkVSbVVndzQwU0NvIiwidGlkIjoiYTI4ZTJmMTgtY2YxZi00YzVkLWEzOWUtZTIxM2YwMDA0ZmU5IiwidW5pcXVlX25hbWUiOiJ0ZXN0MUByY2JqLm5ldCIsInVwbiI6InRlc3QxQHJjYmoubmV0IiwidmVyIjoiMS4wIn0.CrV0v8MtpUxgtY_oRUFp2kOXG9wSW5ucO6qigUn0kDu8_GqhTJKFHOIsNYIQBJxcB7CKnlaaILxCdAQBV-NItHcB3Ubf3U6oWdDb4w92RWaW6EzSV74K2aHCydeu7lF22Xa9-ybr97xec6wsPEsFhQOJHat2L5y1IqFrVpKebl4tRWyIpBx8OPTUu9m8LYpJldmm1_nw3BxbcHmlYrrAER0CugjM3GfFTYaqpARIISXHIgJQT6H4E8UqlN6TklmdR95U7Gjiu9aLnLsotLv1u7ppLLi7u9Fhfz77ZVTF0Gua9SUHo463pud_zHPBpSMhNkookWIxxhg49elAxp6_wQ
+ exit 0
The value of the ASSERTION variable at the end could be copied into http://jwt.io to be inspected.
That concludes our AAD tenant setup example.
Please post questions or comments below.